How to Do Dutch Braids for Beginners: Double Dutch Braid Tutorial
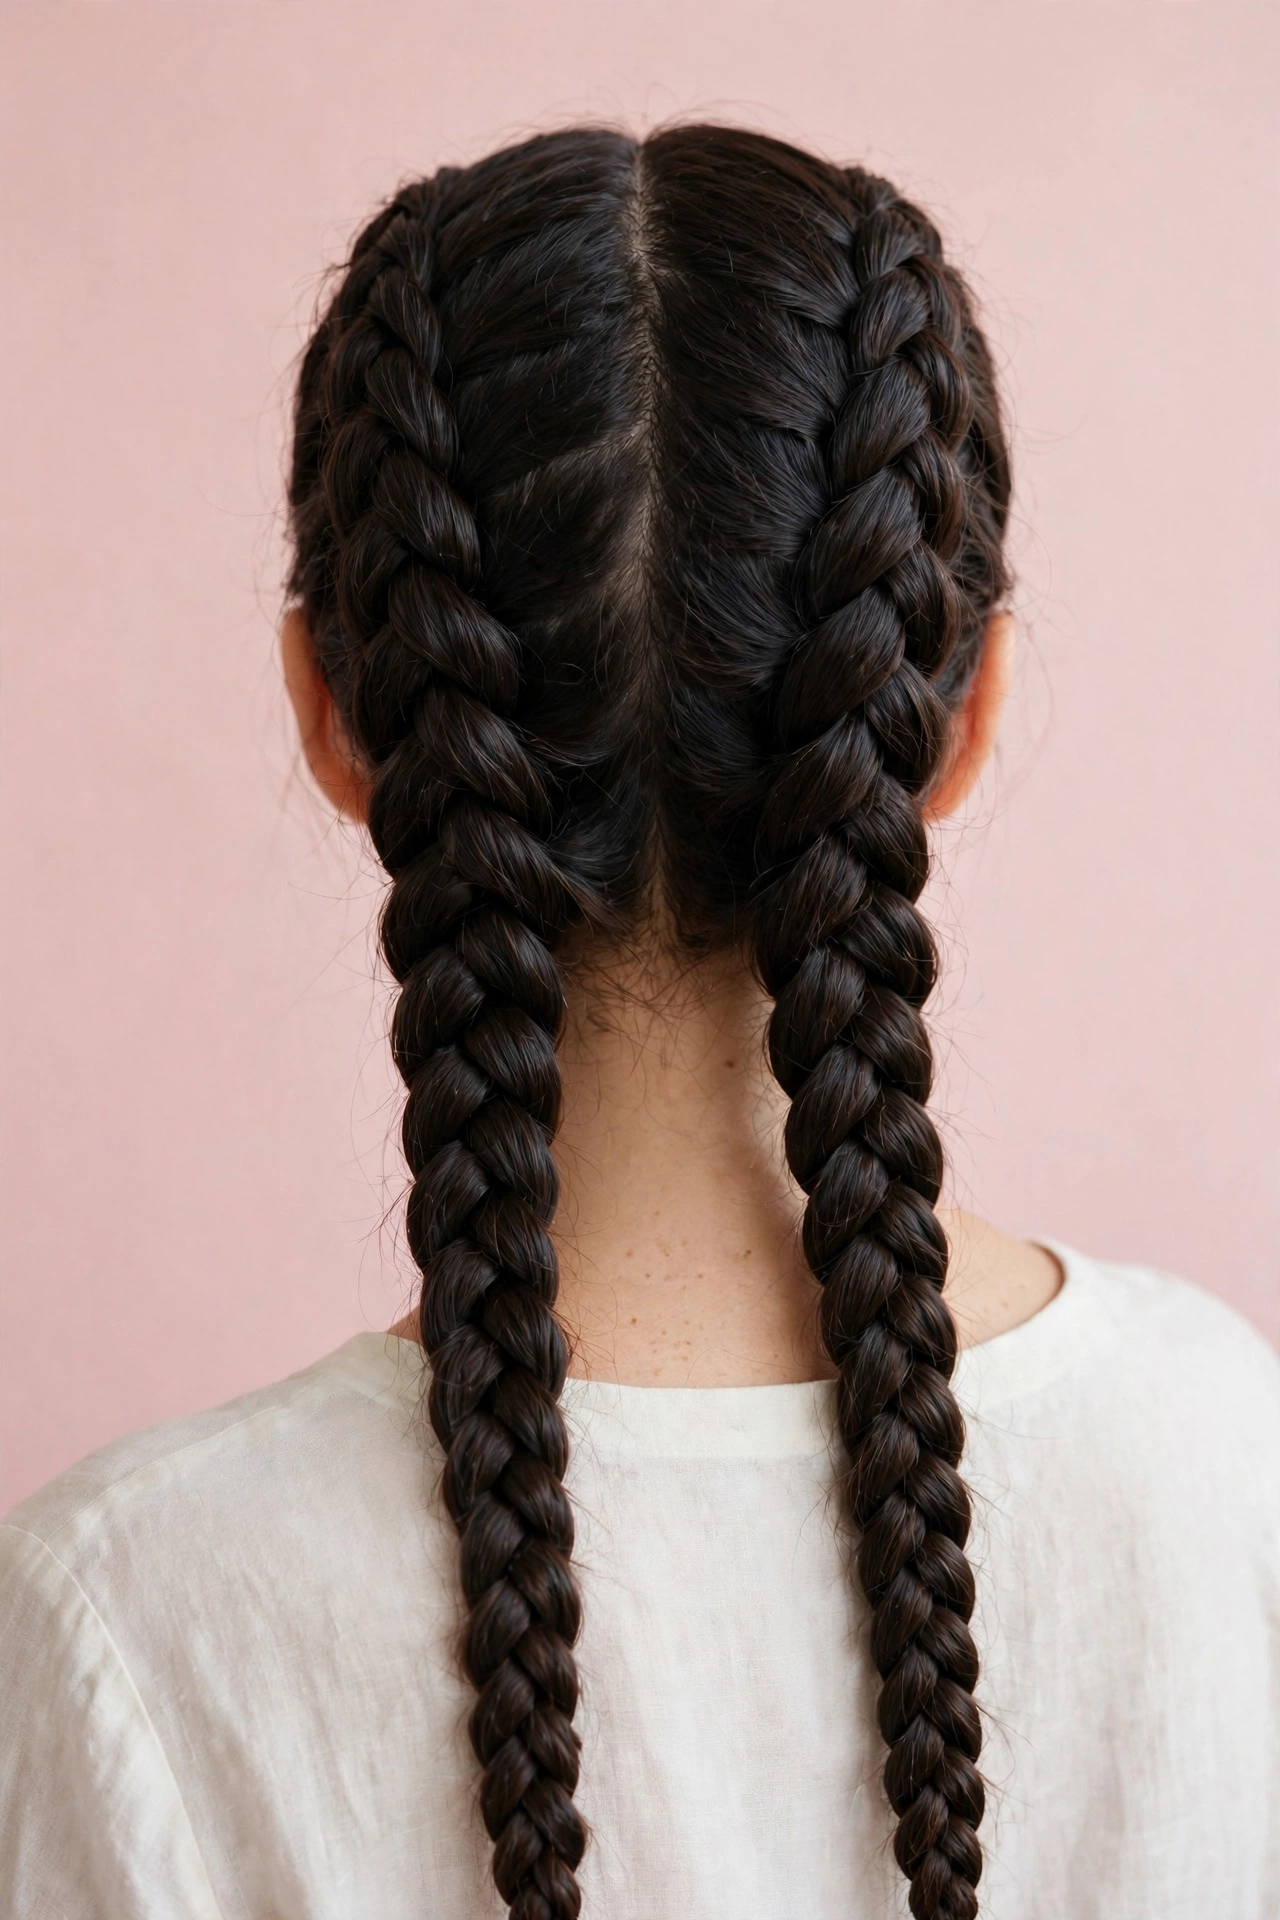
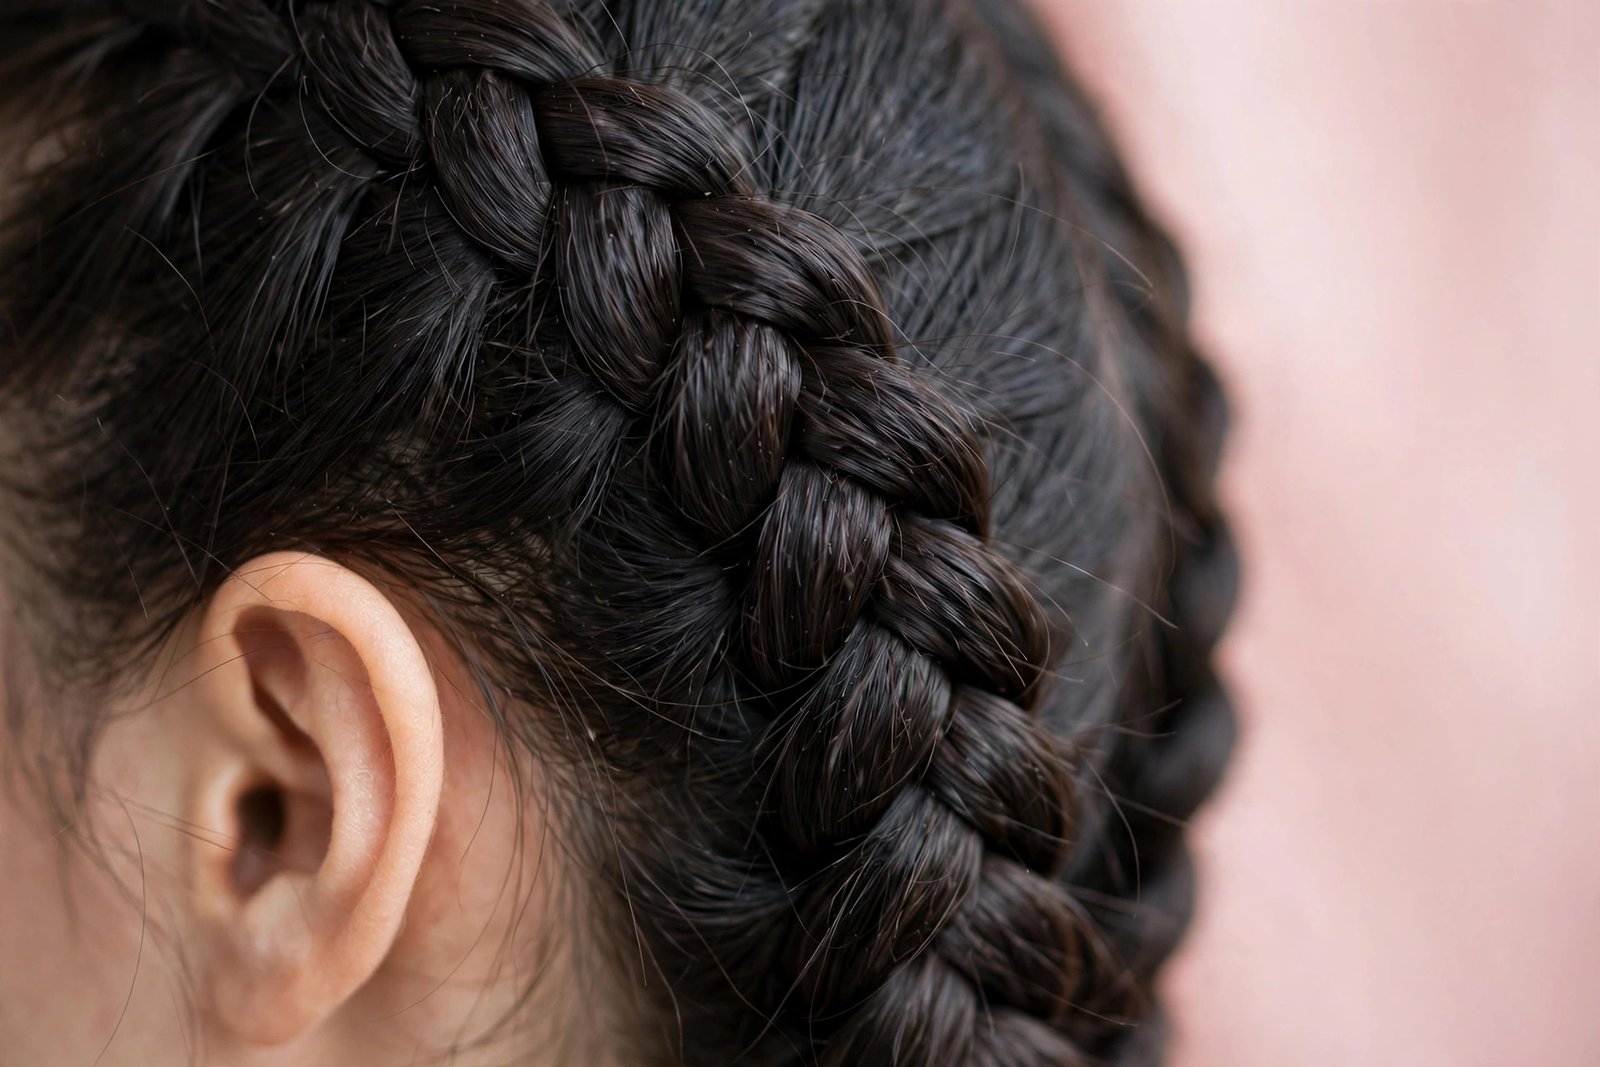
Dutch braids — often called “inside-out” or “reverse French” braids — are the bold, raised braids you see on athletes, festival-goers, and anyone wanting braids with serious dimension. The technique is nearly identical to the French braid with one crucial difference: instead of crossing strands over the middle, you cross them under. That single change makes the braid sit on top of your hair in a 3D rope effect instead of weaving flat into it.
This tutorial focuses on double Dutch braids (one on each side of a center part) — the most popular Dutch braid style and the best one for beginners, since each side uses a smaller, more manageable section of hair. If you haven’t learned French braiding yet, read our French braid tutorial first, or start from the very beginning with our braids for beginners guide.
Dutch Braid vs. French Braid: The One Key Difference
Everything about the setup, sectioning, and hair pickups is the same between French and Dutch braids. The only mechanical difference:
- French braid: side strands cross OVER the middle strand → braid weaves into the hair, lies flat.
- Dutch braid: side strands cross UNDER the middle strand → braid sits on top of the hair, raised 3D effect.
That’s it. If you can French braid, you can Dutch braid — you just need to retrain your fingers to go under instead of over, which feels strange for about the first ten minutes and then becomes natural.
What You Need
- Rat-tail comb for a precise center part (clean parting matters more for doubles — it’s the visible centerpiece)
- 4–6 sectioning clips
- Small elastics (at least 2, plus spares)
- Spray bottle with water
- Light mousse, braid gel, or edge control for grip and sleekness
- Two mirrors for checking the back
Hair prep: Detangle completely, then add grip. Dutch braids look best sleek, so this is the style to use edge control or a light gel along the hairline and part. Slightly damp or day-old hair works best — the same prep principles as any braid.
Step-by-Step: Double Dutch Braids
Step 1: Create a clean center part
Using the rat-tail comb, part your hair straight down the middle from forehead to nape. Take your time — a wobbly part is the most visible flaw in double braids. Clip one entire side away so it doesn’t mix into your working side. A useful trick: part slightly before your hair is fully detangled and smooth, then refine the line after.
Step 2: Section your working side
On the unclipped side, gather a triangle-shaped section at the front hairline (near the temple) — this is where your first braid begins. Divide it into three equal strands: front, middle, back (relative to your head, these correspond to the left/center/right of a regular braid).
Step 3: Anchor with underhand crosses
Here’s where the Dutch technique begins. Cross the front strand under the middle strand. Then cross the back strand under the new middle strand. Do this twice without adding hair to anchor the braid. Note how the strands already start sitting on top rather than sinking in — that’s the Dutch effect.
Hand positioning tip: The underhand motion means your fingers push strands down and under rather than lifting them over. Keep your hands close to the scalp and think of each cross as tucking the strand beneath. Your thumbs are useful here for holding the middle strand steady while the other fingers tuck.
Step 4: Add hair with each underhand cross
Now add the pickup technique: before crossing the front strand under the middle, scoop up a strip of hair from along the front hairline and add it to the front strand. Tuck the combined strand under the middle. Then scoop hair from behind (near the part, working backward), add it to the back strand, and tuck under.
Continue this pattern — front pickup and tuck under, back pickup and tuck under — working from the front hairline diagonally back toward the nape. Keep pickups even (1–2 inches) and tension consistent, exactly as you would in a French braid.
Step 5: Finish the first braid
When you reach the nape and have no more hair to add on that side, continue with a plain three-strand braid — still crossing under — down the remaining length. Secure with an elastic. For a sporty look, you can stop here; for the classic style, continue to the next step.
Step 6: Repeat on the second side
Unclip the other side and repeat Steps 2–5 as a mirror image. This is where beginners struggle most — your non-dominant side feels clumsy. Go slower, check your work in the mirror more often, and accept that the second braid may look slightly different from the first. Symmetry improves fast with practice.
Step 7: Finish and polish
Check both braids in your two-mirror setup. Smooth the center part and hairline with edge control. If you want fuller braids, gently pancake the outer edges from the bottom up. For extra polish, wrap a small strand of hair around each elastic to hide it, securing the wrap with a bobby pin.
Troubleshooting Double Dutch Braids
My braids don’t look raised — they look like French braids. You’re crossing over instead of under (or mixing the two). Slow down and consciously tuck each strand beneath the middle. It helps to say “under” out loud with each cross until the motion is automatic. Even one or two accidental over-crosses will flatten sections of the braid.
The center part looks messy. This usually happens because hair from one side got pulled into the other side’s pickups. Keep the non-working side clipped firmly away, and when taking pickups near the part, use your comb to keep the part line crisp. A little edge control along the part hides minor wobbles.
One braid is tighter/neater than the other. Completely normal — it’s your dominant vs. non-dominant side. Do the harder side first while your arms are fresh and your focus is sharp. Over sessions, the gap closes.
The braids loosen at the crown by end of day. Anchor with two firm underhand crosses at the start (not one), keep the first few pickups small and snug, and don’t pull sections outward away from the scalp — always work with hands close to the head. A light mist of hairspray at the crown after finishing also helps.
My arms give out on the second braid. Double braids are genuinely tiring — you’re essentially braiding twice. Rest between sides: clip the finished braid, shake out your arms for a minute, then start the second side. Tilting your head slightly forward reduces shoulder strain significantly.
Flyaways along the hairline ruin the sleek look. Dutch braids show the hairline prominently, so prep it deliberately: apply edge control or gel along the hairline before you start braiding, and smooth each pickup as you add it. A soft bristle brush is ideal for sweeping the hairline smooth without disturbing the part.
Dutch Braid Variations
- Single Dutch braid: One centered braid using the underhand technique. Simpler than doubles (no part to maintain) and a good first Dutch project.
- Dutch braid crown: Braid around the hairline like a headband, pinning the end behind the opposite ear. Uses the same underhand pickup technique in a curved path.
- Dutch fishtail hybrid: Combine the Dutch underhand idea with the two-strand fishtail weave — cross pieces under instead of over for a uniquely textured braid.
- Dutch braids into a bun: Stop adding hair at the crown, gather into a ponytail, and twist into a bun. The raised braid texture leading into the bun looks intricate with minimal extra effort.
- Jumbo Dutch braids: Use large pickups and pancake aggressively for thick, statement braids. Works best on long, thick hair or with added extension hair.
How Long Do Dutch Braids Last?
As a day-to-several-day style (not a long-term install like box braids):
- Day 1: Crisp and sleek with proper prep and edge control.
- Day 2: Still wearable — refresh the hairline with edge control, re-mist lightly, smooth with palms.
- Day 3: Usually the limit for a neat look; the scalp braiding loosens and frizz sets in. Take down, detangle gently, and redo rather than pushing a fourth day.
Night care: Wrap in a silk or satin scarf, or at minimum use a satin pillowcase. This preserves the sleek hairline, which is the first thing to frizz.
Scalp care between installs: If you wear Dutch braids frequently, keep the scalp clean along the partings and moisturized — the same principles in our scalp care routine guide apply. And as with any scalp braid, pain means too much tension: redo it looser.
Key Takeaways
- Dutch = French braid with strands crossed UNDER instead of OVER, creating a raised 3D braid.
- Double Dutch braids start with a clean center part — take time on the parting, it’s the visible centerpiece.
- Anchor with two firm underhand crosses, add even 1–2 inch pickups, keep hands close to the scalp.
- If your braids look flat, you’re accidentally crossing over — slow down and consciously tuck under.
- Do the non-dominant side first while arms are fresh; asymmetry between sides is normal and improves with practice.
- Lasts 1–3 days with satin night protection; refresh the hairline on day 2 rather than redoing the whole style.
FAQ
Are Dutch braids easier or harder than French braids?
The difficulty is identical — same pickups, same pattern, same behind-the-head coordination. The only challenge is retraining the crossing direction, which feels unnatural for roughly the first ten minutes. If you can French braid, you can Dutch braid the same day.
Why are they called Dutch braids?
The name comes from the “Dutch” style of braiding associated with the Netherlands, where the inside-out technique is traditional. They’re also called reverse French braids or inside-out braids — all the same technique.
Can I do Dutch braids on short hair?
Yes, at chin length and beyond. Shorter hair needs more grip product and smaller pickups, and you’ll likely need bobby pins to secure nape pieces. A single Dutch braid is easier than doubles on shorter lengths since there’s no center part to maintain.
How do I make my Dutch braids look thicker?
Pancake the outer edges gently from bottom to top after braiding — this dramatically increases visual width. Starting with textured (not slippery) hair and lightly teasing the crown section before braiding also add fullness. On fine hair, these two steps together can double the braid’s apparent thickness.
Do Dutch braids damage the hairline?
Only if braided too tightly. The hairline takes the most tension in any scalp braid. Keep the front pickups snug but comfortable — you should never feel pulling pain or see tiny bumps at the hairline. Alternate with loose styles and follow a gentle scalp care routine if you wear them often.
Conclusion
Double Dutch braids look like an advanced style, but they’re really a French braid with one flipped motion — and that makes them one of the highest-reward techniques a beginner can learn. Get the center part clean, drill the underhand tuck until your fingers stop trying to cross over, and do your weaker side first. Within a few weeks of practice, you’ll be putting in crisp, raised, symmetrical doubles in under 20 minutes.
Keep building from here: refine the original with our French braid tutorial, try the delicate weave of the fishtail braid, explore long-term protective options in our guide to how long box braids last, or revisit the full foundation in the complete braids for beginners guide.
Love this? Pin it for later!