Wedding Guest Makeup That Lasts All Day (Tutorial)
Wedding days are marathons, not sprints. Between the morning prep, an emotional ceremony, outdoor photos, a three-course dinner, and hours of dancing, your makeup has to perform for 10 to 12 hours straight — in heat, humidity, and the occasional happy tear. The good news: long-lasting wedding guest makeup isn’t about piling on more product. It’s about the right prep, the right layering order, and two or three sealing steps that lock everything in place.
This tutorial walks you through the complete routine — skin prep, base, eyes, lips, and the finishing touches — in an order that beginners can follow without feeling overwhelmed. Every step is designed for longevity first and beauty second, because the prettiest look means nothing if it’s melting by the speeches.
Key Takeaways
- Prep is 80% of longevity: hydrated, primed skin holds makeup far longer than dry or oily skin does.
- Layer thin products: several sheer layers outlast one heavy layer of foundation.
- Seal twice: setting powder mid-routine + setting spray at the end is the professional formula for all-day wear.
- Waterproof where it matters: eyeliner and mascara should be waterproof; foundation usually shouldn’t be.
- Blot, don’t powder: blotting papers refresh shine without adding cakey layers.
- Photography matters: skip heavy SPF flashback foundations and overly shimmery highlighters for wedding photos.
Step 1: Skin Prep (The Foundation of Long Wear)
Cleanse and Exfoliate Gently
Start with a clean, smooth canvas. Wash your face with a gentle cleanser, and if your skin feels rough or flaky, use a mild chemical exfoliant or a soft scrub the night before — not the morning of. Exfoliating too close to makeup application can leave skin reactive and make foundation pill. Pat skin dry; never rub.
Hydrate in Layers
Dehydrated skin drinks up foundation, leaving it patchy by hour six. Apply a lightweight hydrating toner or essence, then a moisturizer suited to your skin type. Oily skin types should still moisturize — skipping it causes skin to overproduce oil, which breaks down makeup faster. Wait at least five minutes before moving to primer so the layers absorb fully. If you’re new to event makeup routines, this waiting step is the one beginners skip most often, and it makes the biggest difference.
Don’t Skip Eye Cream
The under-eye area is thin and prone to creasing. A small amount of lightweight eye cream prevents concealer from settling into fine lines. Avoid heavy, greasy formulas — they can cause concealer to slide.
Step 2: Primer (Your Makeup’s Grip)
Primer is the single most underrated longevity product. A good primer creates a smooth barrier between skin and makeup, fills in pores, and gives foundation something to grip.
Match Primer to Skin Concern
- Oily skin: a mattifying or pore-blurring primer on the T-zone.
- Dry skin: a hydrating, dewy primer all over.
- Large pores: a silicone-based blurring primer pressed (not rubbed) into the nose, cheeks, and chin.
- Redness: a color-correcting primer with a green or peach tint.
Apply a pea-sized amount with clean fingers or a brush, and let it set for 60 seconds. Rushing primer is like painting over wet plaster — the next layer won’t adhere.
Step 3: Long-Wear Base (Sheer Layers Win)
Choose the Right Foundation Formula
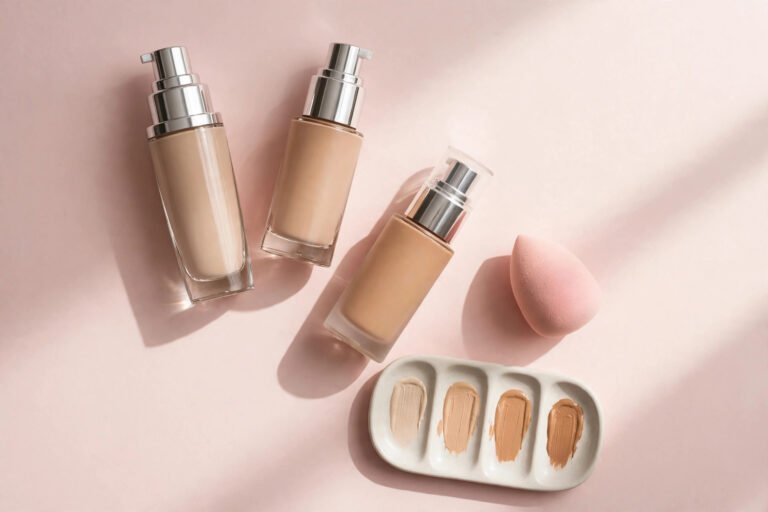
For a 12-hour day, reach for a foundation marketed as long-wear, transfer-resistant, or “24-hour.” These formulas contain film-forming ingredients that flex with your skin instead of cracking. Medium coverage is usually the sweet spot for weddings — full coverage looks heavy in daylight photos, while sheer coverage fades by evening.
Flash photography warning: some foundations with high SPF cause “flashback,” a white cast in photos. If you know there will be flash photography, test your foundation with a phone flash photo beforehand, or choose a formula without mineral SPF. For more on this, see our guide to makeup that photographs well.
Apply in Thin Layers
The golden rule of longevity: two thin layers beat one thick one. Apply the first sheer layer with a damp beauty sponge, pressing and bouncing rather than dragging. Let it set for a minute, then spot-apply a second layer only where you need more coverage — redness around the nose, blemishes, uneven areas. This technique prevents the heavy, mask-like look that cracks and fades unevenly.
Conceal Strategically
Apply concealer after foundation (not before), so you use less and it stays put. Use a brightening concealer under the eyes in a triangle shape, blended with a sponge, and a skin-tone concealer on blemishes. Set the under-eye area immediately with a light dusting of translucent powder to prevent creasing — under-eyes are the first place long-wear makeup fails.
Step 4: Set the Base (The First Seal)
Setting is where wedding guest makeup diverges from everyday makeup. This is the first of your two sealing steps, and it’s non-negotiable.
Powder the Right Zones
Use a finely milled translucent setting powder on the T-zone, under the eyes, and anywhere you crease or get shiny. Press it in with a puff or damp sponge — pressing sets better than sweeping with a fluffy brush, which can disturb the foundation underneath. Leave the outer cheeks and high points of the face powder-free if you want a natural glow; over-powdering is the fastest route to a flat, cakey finish in photos.
If you’re unsure whether powder or spray is doing the heavy lifting, our breakdown of setting spray vs setting powder explains when to use each and how they work together.
Cream Products Before Powder (Always)
One common beginner mistake is applying cream blush or contour after powder — the powder grabs the cream and creates patchiness. The correct order is: cream products first (cream blush, cream contour), then powder, then powder blush or bronzer on top if you want extra intensity. This order also helps everything melt together for a skin-like finish.
Step 5: Wedding-Appropriate Eyes
Keep It Soft but Defined
Wedding guest makeup should be polished without competing with the wedding party. A soft, defined eye — neutral mattes in the crease, a touch of shimmer on the lid, and clean liner — photographs beautifully and suits every dress code from garden ceremony to black-tie reception.
Beginner eye sequence:
1. Apply an eyeshadow primer from lash line to brow bone. This is the difference between eyeshadow that lasts 12 hours and eyeshadow that vanishes by dinner.
2. Sweep a matte transition shade (close to your skin tone, one or two shades deeper) through the crease with a fluffy brush.
3. Deepen the outer corner with a slightly darker matte shade in a sideways “V” or windshield-wiper motion.
4. Pat a shimmer or satin shade onto the center of the lid with your finger — fingers pack on more pigment than brushes.
5. Highlight the inner corner and brow bone with a light matte or subtle shimmer.
Waterproof Liner and Mascara Are Non-Negotiable
Happy tears are real, and they’re the number-one destroyer of wedding eye makeup. Use a waterproof eyeliner — gel, liquid, or a well-set pencil — and a waterproof mascara. Tightlining (lining the upper waterline) defines the eyes without a visible line that can smudge, making it ideal for beginners. Curl lashes before mascara, and apply two thin coats rather than one heavy one.
Brows Frame Everything
Filled-in brows make the whole face look more polished in photos. Use a brow pencil or powder one shade lighter than your natural brow color for a soft look, and set with a clear or tinted brow gel so they don’t fade or move during the day.
Step 6: Cheeks, Glow, and Color
Blush That Lasts Through Dinner
Cream blush applied before powder gives a lit-from-within flush that lasts; layering a matching powder blush on top after setting doubles the staying power. Smile and apply to the apples of the cheeks, blending upward toward the temples — never too close to the nose, which can look clownish in photos.
Bronzer and Highlighter (With Restraint)
A light bronzer in a “3” shape along the temples, cheekbones, and jawline adds warmth and dimension. For highlighter, choose a subtle, finely milled formula on the high points of the cheekbones, the bridge of the nose, and the cupid’s bow. Avoid chunky glitter — it reads as texture in high-resolution wedding photos. If the wedding is outdoors in bright sun, consider skipping highlighter entirely; natural sheen plus sunlight is plenty.
Step 7: Lips That Survive the Toast
Lipstick is the first thing to go at a wedding — talking, eating, drinking, and kissing cheeks all take their toll. A long-wear lip strategy has three parts:
- Exfoliate and hydrate lips beforehand with a lip scrub or a damp toothbrush, then a thin layer of lip balm. Blot off excess balm before color.
- Line and fill with a lip liner that matches your lipstick. Filling in the entire lip with liner creates a stain-like base that survives even after the lipstick wears off.
- Choose your formula: a matte liquid lipstick lasts longest but can feel dry; a satin or cream lipstick with a liner base is more comfortable and easier to touch up. Either way, bring the lipstick with you for reapplication after the meal.
Classic wedding-guest shades — rosy nudes, soft berries, muted roses — flatter most skin tones and don’t clash with wedding party colors. Save the bold red for the dance floor if you’re feeling it later.
Step 8: The Final Seal (Setting Spray)
Once every product is applied, hold a setting spray 8 to 10 inches from your face and mist in an “X” and “T” pattern. This melts the powder into the skin, removes any powdery finish, and adds a flexible film that locks everything down. For maximum longevity, makeup artists often spray between layers too — a light mist after foundation and again at the very end. If you want the full playbook, our guide on making makeup last all day covers layering, touch-up kits, and the products worth investing in.
Your Wedding-Day Touch-Up Kit
Pack a small pouch — it fits in even a clutch:
- Blotting papers: press onto shiny areas; never rub.
- Pressed powder compact: one light press on the T-zone after blotting, only if needed.
- Lipstick and liner: reapply after the meal.
- Mini setting spray: one refresh mist mid-reception revives everything.
- Cotton swabs: dipped in a touch of micellar water, they fix mascara smudges and eyeliner migration instantly.
- A few bobby pins and a mini deodorant wipe: because weddings are long days for hair and everything else too.
Touch up sparingly. The biggest mistake guests make is re-powdering every hour, which builds up into a cakey layer by evening. Blot first, powder only when blotting isn’t enough.
Common Mistakes to Avoid
- Trying a new product on the day. Always do a trial run at least a week before — new foundations can oxidize, irritate, or photograph badly.
- Skipping primer or setting steps because you’re in a rush. These two steps are the entire longevity system.
- Over-powdering in an attempt to stay matte. It backfires by hour five.
- Matching the wedding party’s exact look. You want to look like a polished guest, not an honorary bridesmaid.
- Forgetting your neck and ears. Blend foundation down the jawline and check your ears in daylight — mismatched tones show in photos.
Frequently Asked Questions
How far in advance should I do a makeup trial run?
Do a full trial — same products, same order — at least one week before the wedding, and wear it for a full day. Take photos in daylight and with flash. This reveals oxidation, flashback, and wear patterns while you still have time to swap products.
Should wedding guest makeup be matte or dewy?
A satin finish is the safest middle ground. Fully matte can look flat and aging in photos; fully dewy can read as oily by evening. Set the T-zone matte and leave the outer face with a natural glow.
What makeup lasts longest in hot or humid weather?
In heat and humidity, prioritize: mattifying primer on the T-zone, long-wear transfer-resistant foundation, waterproof eye products, cream blush (it melts into skin rather than sitting on top), and a strong setting spray. Carry blotting papers and avoid touching your face.
Can I wear a bold lip as a wedding guest?
Yes — a classic red or berry lip is perfectly appropriate for most weddings, especially evening receptions. Keep the eyes softer to balance it, and choose a long-wear formula since bold colors show wear more obviously.
How do I stop my under-eye concealer from creasing during a long day?
Use less product than you think you need, blend it fully with a damp sponge, and set immediately with a small amount of finely milled translucent powder pressed in with a puff. Avoid applying concealer too close to the lower lash line, where it migrates first.
Is setting spray really necessary, or is powder enough?
For a 4-hour evening, powder alone is fine. For a 10–12 hour wedding day, you need both. Powder controls oil and sets cream products; setting spray melts everything together and adds a flexible seal that powder alone can’t provide.
Conclusion
Long-lasting wedding guest makeup comes down to a simple formula: thorough skin prep, thin layers, primer at the start, powder in the middle, and setting spray at the end — with waterproof eye products and a smart touch-up kit as your insurance policy. Follow this tutorial step by step, do a trial run a week before, and you’ll look as fresh at the last dance as you did walking into the ceremony.
For a broader routine that covers interviews, date nights, and other big days, explore our complete special occasion makeup guide — the same longevity principles apply, with the intensity adjusted for each event.
Love this? Pin it for later!