Hair Extensions for Beginners: The Complete Guide
If you’ve ever scrolled past a photo of impossibly long, full hair and thought “there’s no way that’s all hers,” you were probably right — and there’s no shame in it. Hair extensions are one of the most common beauty tools in the world, used quietly by everyone from brides to busy moms to women growing out an awkward haircut. The problem for beginners isn’t finding extensions — it’s figuring out which type is right for you, what they should cost, and how to avoid the stiff, obvious look that gives extensions a bad name.
This guide covers all of that. You’ll learn the six main types of hair extensions, how to choose between human hair and synthetic, what a realistic budget looks like, and the care habits that make extensions look natural instead of costume-y. No jargon, no gatekeeping — just what you actually need to know before you buy. And if your natural hair needs some love first, start with a solid beginner-friendly hair care routine before adding anything to it.
Key Takeaways
- Clip-in extensions are the safest first choice for beginners: affordable, damage-free, and removable at home.
- Human hair costs more but looks and behaves naturally; quality synthetic is fine for occasional wear.
- The biggest beginner mistake is buying the wrong color or weight — matching your texture matters more than length.
- Tape-ins and sew-ins require professional installation and maintenance every 6–8 weeks.
- Extensions don’t have to damage your hair if you choose the right method and maintain them properly.
What Are Hair Extensions, Exactly?
Hair extensions are strands of hair — real or synthetic — attached to your natural hair to add length, volume, or both. They can also add color highlights without dye, fill in thinning areas, or simply give you the thick ponytail your genetics never provided. Extensions aren’t a single product; they’re a whole category of methods, each with different attachment systems, price points, wear times, and maintenance needs.
The reason beginners get overwhelmed is that the extension world loves abbreviations and brand names. Tape-ins, wefts, I-tips, keratin bonds, halos — it sounds like a chemistry syllabus. Here’s the simple version: every extension method answers two questions. How does it attach to your hair? And how long does it stay in? Temporary methods (clip-ins, halos) attach and remove daily with zero commitment. Semi-permanent methods (tape-ins, sew-ins, microlinks, fusion) stay in for weeks and need a professional to install and remove. Understanding that split is 80% of the decision.
One more thing worth knowing upfront: extensions are an investment in maintenance, not just the purchase price. Every method has ongoing costs — move-up appointments, special brushes, sulfate-free shampoo, replacement sets. Budget for the upkeep, not just the hair, and you’ll avoid the most common beginner regret: a gorgeous first week followed by a tangled, neglected mess.
The 6 Main Types of Hair Extensions
1. Clip-In Extensions
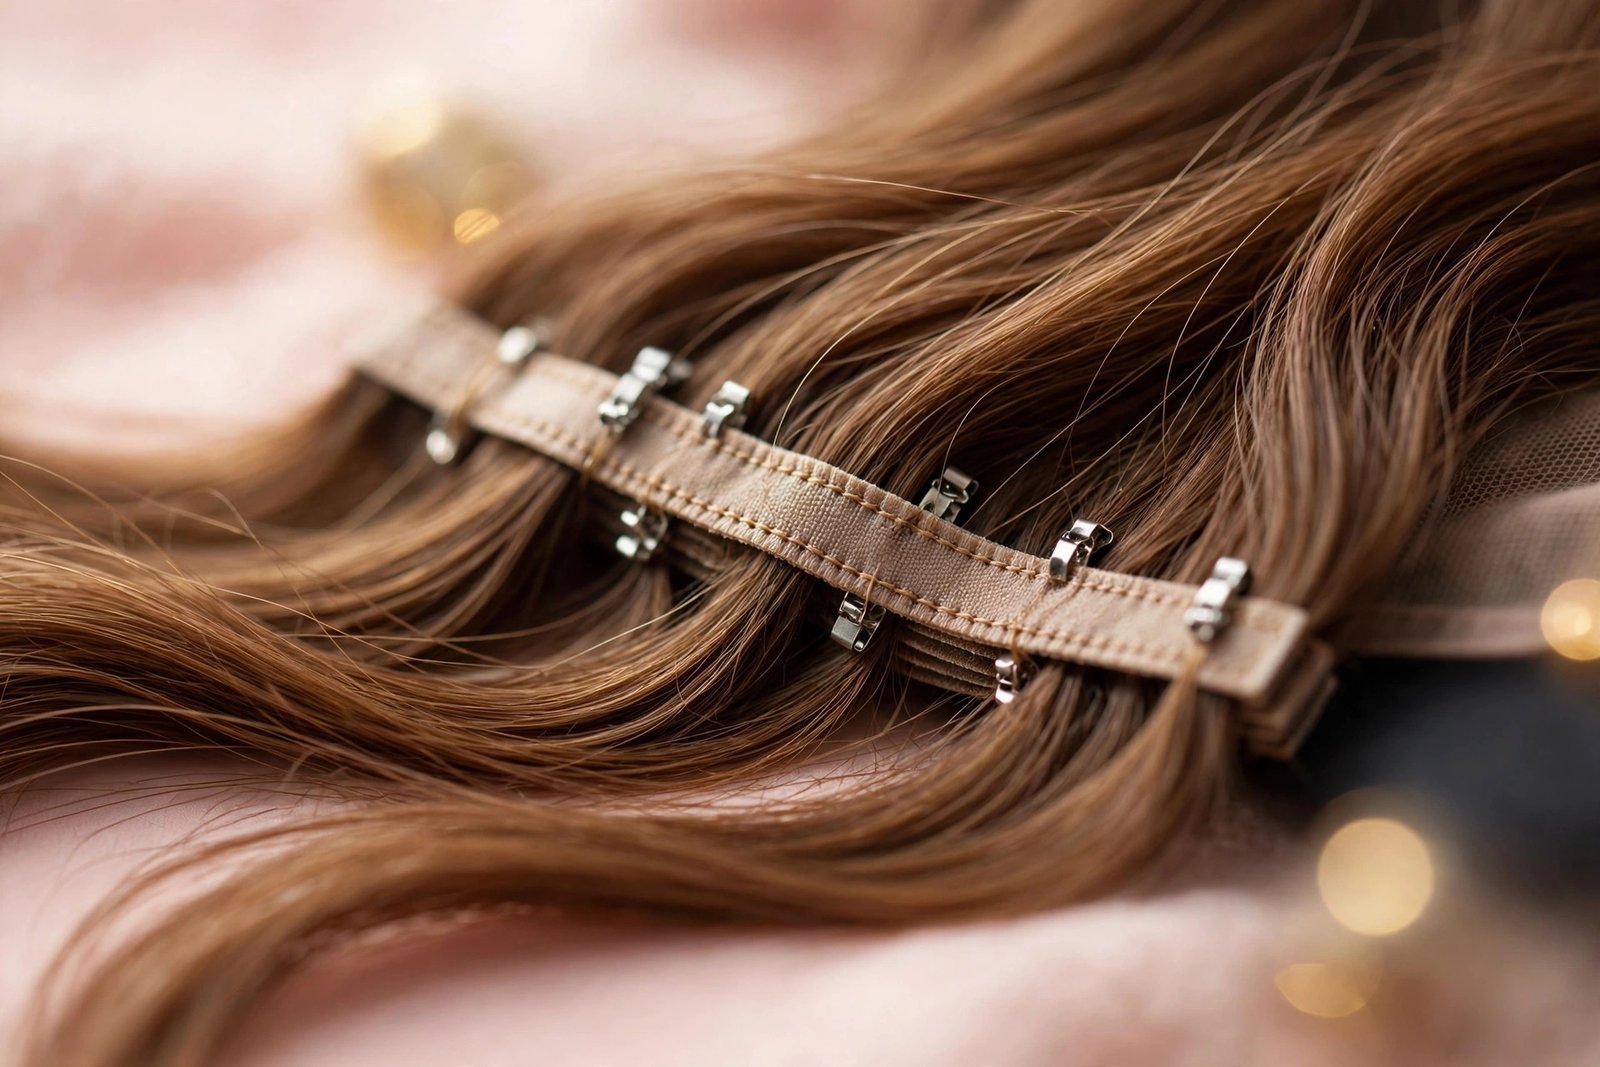
Clip-ins are wefts of hair with small pressure-sensitive clips sewn onto them. You section your hair, snap the clips near the roots, and let your top layer fall over them. The whole process takes 10–15 minutes once you practice, and they come out just as fast — no stylist, no glue, no commitment.
For beginners, clip-ins are the universal recommendation, and for good reason: they’re the cheapest entry point (typically $50–$250 for human hair), they cause virtually no damage because they don’t pull on your hair overnight, and you can wear them only when you want — a wedding on Saturday, nothing on Monday. If you’re torn between the two most popular temporary and semi-permanent options, our honest clip-in vs tape-in comparison breaks down the differences side by side.
The trade-offs: clip-ins can feel heavy by the end of the day, the clips can slip on very fine or silky hair, and they don’t work well for updos unless you learn strategic placement. They’re also not an everyday solution for most people — clipping in a full set daily gets old. But as a first step into extensions, nothing beats them for low risk.
2. Tape-In Extensions
Tape-ins are thin wefts with a medical-grade adhesive strip. Your stylist sandwiches a thin slice of your natural hair between two wefts, and the result lies flat against your head — nearly invisible and very comfortable. They stay in for 6–8 weeks, then your stylist removes them, re-tapes, and moves them up.
Tape-ins are the most popular salon method right now because they hit a sweet spot: more natural-looking and longer-lasting than clip-ins, but faster and cheaper to install than sew-ins or fusion. A full head takes 30–60 minutes in the chair. They’re also one of the gentlest semi-permanent options when installed correctly, since the weight is distributed across the tape rather than pulling from a single point.
The catch is maintenance. You can’t use oily or silicone-heavy products near the bonds, you need to brush carefully around them, and every 6–8 weeks you’re back in the salon paying for a move-up ($100–$250). For a beginner who wants everyday length without daily effort, tape-ins are a strong second step after trying clip-ins.
3. Sew-In Extensions (Weaves)
Sew-ins are the classic method: your natural hair is braided into cornrows, and wefts of hair are sewn onto the braids with a needle and thread. They last 6–8 weeks, handle heat styling beautifully, and are the go-to for adding dramatic length and volume — especially on thick or coily hair textures, where the braided base blends seamlessly.
Sew-ins are protective in one sense (your natural hair is tucked away in braids) but demanding in another: the braids need to stay clean and dry underneath, the installation takes 2–4 hours, and a too-tight braid pattern can cause tension headaches or even traction alopecia if a stylist braids aggressively. This method really depends on finding an experienced installer — it’s not a DIY situation.
Cost-wise, sew-ins sit in the mid-to-high range: $200–$600+ for installation plus the hair itself. They’re best for someone committed to long-term wear who has enough natural hair to braid securely.
4. Fusion / Bonded Extensions
Fusion extensions attach individual strands to your hair using keratin bonds melted with a heat tool (or cold fusion with ultrasonic waves). Each bond is tiny — about the size of a grain of rice — which makes fusion the most natural-looking and natural-moving method available. Strands move individually like real hair, and updos look completely seamless.
The downside is everything else: installation takes 3–6 hours, it’s the most expensive method ($500–$2,000+), and removal requires a solvent and a professional. Heat fusion can damage fine hair, and the grow-out phase (as bonds slide down) needs careful brushing to prevent matting at the roots. Fusion is a power-user method — fantastic results, but overkill for a beginner who’s still learning what they want.
5. Microlink / I-Tip Extensions
Microlinks (also called I-tips) attach small bundles of hair using tiny silicone-lined beads clamped onto your natural hair — no heat, no glue. They’re reusable, the strands move naturally, and installation takes 2–3 hours. Like fusion, they give a very natural result with 360-degree styling freedom.
The bead method is gentler than heat fusion but still puts mechanical stress on individual strands of your hair, so it’s not ideal for very fine or fragile hair. Beads can slip on silky hair textures, and you’ll feel them when you run your fingers through your hair for the first week or two. Maintenance appointments every 6–8 weeks keep them positioned correctly. Expect $400–$1,200+ all in.
6. Halo Extensions
The halo is the simplest method of all: a single weft attached to an invisible wire that sits on your crown like a headband, with your top hair pulled over it. No clips, no glue, no braids — it takes about two minutes to put on and causes zero damage since nothing attaches to your hair at all.
Halos are brilliant for fine-haired beginners who find clips uncomfortable or visible. The limitations: one weft means less volume than a full clip-in set, the wire can shift during very active days, and it only adds length from the crown down — it won’t thicken the very top of your head. Prices run $100–$400 for human hair. Think of the halo as clip-ins’ gentler, lazier cousin.
Human Hair vs Synthetic: Which Should a Beginner Choose?
This is the second-biggest decision after the method, and the price gap is dramatic — a human-hair set can cost five times more than synthetic. Here’s how to think about it.
Human hair (often labeled “100% Remy human hair,” meaning the cuticles are intact and aligned) looks, feels, and behaves like your own hair. You can heat-style it, dye it darker, wash it normally, and it lasts 6–12 months of regular wear. The movement is the giveaway — human hair swings and settles naturally in a way synthetic struggles to copy. The downsides are price ($100–$400+ for a good set) and maintenance: it needs washing, conditioning, and heat protectant just like your own hair.
Synthetic hair has improved enormously — modern heat-friendly synthetics can handle low-heat styling and look surprisingly convincing in photos. A decent set costs $20–$60, making it perfect for one-off events or for testing whether you even like wearing extensions before investing. The limitations: most synthetics can’t handle high heat, they tangle faster, they develop an unnatural shine over time, and they typically last 1–3 months of regular wear.
The beginner rule of thumb: buy synthetic first if you’re experimenting, buy human hair once you’re committed. There’s no point spending $250 on Remy hair to discover you hate the feeling of wefts on your head. But if you already know you want extensions as a regular thing, human hair is cheaper per wear and looks better in person (as opposed to just in photos).
One warning: the market is full of “human hair blends” and mislabeled products. If a listing claims 100% human hair at a $30 price point, it’s not. Buy from established extension brands with real reviews, and be suspicious of marketplace sellers with stock photos and no returns policy.
How to Choose Your First Set
Match Your Texture, Not Just the Color
Beginners obsess over color matching and ignore texture — and texture mismatch is actually what makes extensions look fake. If your hair is naturally wavy and you buy pin-straight extensions, no amount of color matching will hide the difference. Most extension brands offer straight, wavy, and curly textures; choose the one closest to your natural hair on a normal day, not your flat-ironed hair. You can always style both together, but starting close saves enormous blending effort.
Pick the Right Length
Longer isn’t better — it’s just heavier and harder to blend. Measure from the crown of your head: 14–16 inches adds subtle fullness, 18 inches gives noticeable length on most people, and 20–24 inches is the dramatic mermaid look. For a first set, 16–18 inches is the sweet spot for most beginners: long enough to feel transformative, short enough to blend with shoulder-length or longer natural hair. Going from a bob to 24 inches in one jump almost always looks obvious.
Get the Weight Right
Extension sets are sold by weight (grams), and this determines fullness. For fine or thin hair, 120–160 grams is plenty — heavier sets pull uncomfortably and the wefts show through sparse hair. Medium hair does well with 160–200 grams. Thick hair may need 200–220+ grams to blend without the natural hair overwhelming the extensions. When in doubt, go lighter: you can always add a weft, but you can’t make a heavy set comfortable.
Color-Matching Tricks
Match the extensions to the ends of your hair, not the roots — the ends are what sit beside the extensions and what the eye compares. If you’re between shades, go slightly darker rather than lighter; darker blends more forgivingly. For highlighted or balayaged hair, look for “rooted” or multi-tonal sets rather than a single flat color. Many brands offer free color-matching services — send a photo of your hair in natural daylight and let an expert pick. It’s free and dramatically improves your odds.
How Much Do Hair Extensions Cost?
Realistic price ranges for a first-timer, including the hair and typical installation:
| Method | Hair cost | Installation | Yearly maintenance | Total first year |
|---|---|---|---|---|
| Clip-ins (human hair) | $50–$250 | DIY ($0) | Minimal | $50–$300 |
| Halo | $100–$400 | DIY ($0) | Minimal | $100–$450 |
| Tape-ins | $100–$400 | $100–$300 | $600–$1,200 in move-ups | $800–$1,500 |
| Sew-in | $100–$300 | $200–$600 | $400–$900 in reinstalls | $700–$1,800 |
| Microlinks | $200–$500 | $200–$700 | $600–$1,200 | $1,000–$2,400 |
| Fusion | $300–$800 | $500–$1,500 | $500–$1,000 | $1,300–$3,300 |
These are honest mid-range numbers — you can spend less with synthetic hair or budget salons, and luxury versions of everything cost more. The key insight for beginners: temporary methods cost hundreds once; semi-permanent methods cost hundreds repeatedly. Make sure the ongoing number fits your budget before you commit.
The Honest Pros and Cons
Pros:
– Instant length and volume — no waiting months for growth
– Damage-free color experimentation (highlights without bleach)
– Versatility for events, photos, and special occasions
– Confidence boost that’s hard to quantify but very real
– Temporary options let you change your mind anytime
Cons:
– Ongoing cost and maintenance for semi-permanent methods
– Learning curve — first applications look rough for everyone
– Can damage hair if the wrong method is used or maintenance is skipped
– Daily wear methods (clip-ins) add morning routine time
– Sleeping, swimming, and intense workouts need adjustments
Will Extensions Damage Your Hair?
This is the question that stops most beginners, so let’s be direct: extensions don’t inherently damage hair — bad installation, wrong method choice, and neglected maintenance do. Dermatologists and trichologists consistently point to the same culprits: excessive tension (too-tight braids, overloaded bonds on fine hair), leaving semi-permanent methods in far past their move-up window, and ripping out adhesive methods instead of dissolving them properly.
Clip-ins and halos are the lowest-risk options because nothing bonds to your hair and you remove them daily. Tape-ins are low-risk when a trained stylist installs and removes them on schedule. The higher-risk methods for beginners are sew-ins done too tightly and fusion on fine, fragile hair — both concentrate stress in ways that can cause breakage or traction alopecia over time.
Protect yourself with three rules: choose a method suited to your hair’s thickness and strength (fine hair + heavy methods = trouble), never skip maintenance appointments, and if something hurts, itches persistently, or causes headaches — that’s your hair telling you something is wrong. Pain is never normal with extensions.
Basic Care That Keeps Extensions Looking Good
Extension hair doesn’t receive oils from your scalp, so it dries out faster than your natural hair — everything in extension care is about moisture and gentleness. Brush with a loop brush or wide-tooth comb, working from ends upward. Wash less often than your natural hair (clip-ins: every 15–20 wears; semi-permanent: 2–3 times per week max) with sulfate-free shampoo, and always follow with conditioner on the mid-lengths and ends.
Heat-style on medium settings with heat protectant, and never apply direct high heat to bonds, tapes, or clips. Sleep with hair in a loose braid or low ponytail — for semi-permanent methods, a silk pillowcase reduces friction tangling dramatically. And store clip-ins flat or gently rolled in their box, never crumpled in a drawer. For the full routine, our guide to washing hair extensions properly covers products, frequency, and the mistakes that ruin wefts.
7 Beginner Mistakes to Avoid
- Buying too long. The #1 regret. Start at 16–18 inches; you can go longer on your second set.
- Matching roots instead of ends. Extensions sit beside your ends — match those.
- Skipping the blend. Unstyled extensions sitting next to styled natural hair always look obvious. Style them together.
- Using regular brushes on wefts. Standard bristle brushes shred extension hair; use a loop brush.
- Sleeping in clip-ins. They’ll tangle, mat, and stress your roots. Take 2 minutes to remove them.
- Oily products near tape bonds. Oils dissolve adhesive — keep serums on the mid-lengths and ends only.
- Ignoring move-up appointments. Grown-out extensions mat at the roots and become a removal nightmare.
Frequently Asked Questions
How long do hair extensions last?
It depends on the method and hair quality. Clip-in human hair lasts 6–12 months with occasional wear; synthetic lasts 1–3 months. Tape-ins and sew-ins stay in 6–8 weeks per install, but the hair itself can be reused for 2–4 move-ups. Fusion and microlinks last 3–4 months per install. Proper care roughly doubles every lifespan.
Can I dye my hair extensions?
Human hair extensions can be dyed darker (going lighter requires bleach and usually ruins them — don’t). Always do a strand test first, and when in doubt, have a stylist do it. Synthetic extensions generally can’t be dyed at all since the fibers don’t absorb color.
Can I sleep in hair extensions?
Clip-ins and halos: no — remove them nightly. Tape-ins, sew-ins, microlinks, and fusion: yes, they’re designed for continuous wear, but sleep with hair in a loose braid and consider a silk pillowcase to prevent tangling.
How often should I wash my extensions?
Less than you think. Clip-ins: every 15–20 wears, or when product buildup is visible. Semi-permanent methods: 2–3 times per week maximum with sulfate-free shampoo. Over-washing is the fastest way to dry out extension hair since it gets no natural scalp oils.
Will people be able to tell I’m wearing extensions?
Not if you match color, texture, and weight correctly and blend properly. The giveaways are always the same: wrong color, too much length too fast, visible wefts from poor placement, and unblended texture. Done right, even hairdressers need a close look.
Do extensions work on short or thin hair?
Yes, with caveats. For short hair (above shoulders), choose textured or layered extension cuts and plan on thorough blending — straight 22-inch wefts against a bob rarely fool anyone. For thin hair, lighter sets (120–160g), tape-ins, or halos distribute weight best; avoid heavy clip-in sets that show through sparse hair.
Extensions vs wigs — which should a beginner try?
They solve different problems. Extensions add to your existing hair; wigs replace the look entirely. If you want more length or volume while keeping your natural hairline and part, extensions are the move. If you want dramatic color changes, protective styling, or have significant hair loss, a wig may serve you better — our beginner’s guide to choosing a wig walks through that decision.
The Bottom Line
The best first extension is the one you’ll actually wear and maintain. For most beginners, that means starting with clip-ins: they’re affordable, removable, and they teach you what length, weight, and color work for you before you invest in anything permanent. Once you know you love the look — and you’re honest about the maintenance budget — stepping up to tape-ins or another salon method is a natural next move.
Ready for the practical side? Our step-by-step guide to putting in clip-ins shows you exactly how to apply them for a seamless finish. Take your time choosing, match carefully, and remember: the goal is hair that looks like yours, just better.
Love this? Pin it for later!