Cat-Eye Nails Tutorial: Goth & Dark Red Designs for Fall
Few nail trends have exploded like cat-eye nails. Pinterest searches for polka-dot cat-eye nails are up 1,585%, and goth cat-eye nails have surged 911% — this magnetic manicure is officially the fall nail moment. The good news: cat-eye nails are one of the most beginner-friendly “advanced” nail looks out there. If you can paint your nails, you can do this — the magnet does the artistry for you.
This tutorial walks through exactly what cat-eye polish is, what you need, the technique step by step, and two fall-perfect design families: goth (black, purple, charcoal) and dark red (burgundy, cherry, oxblood). Plus troubleshooting for the two problems beginners hit most.
What Is Cat-Eye Nail Polish?
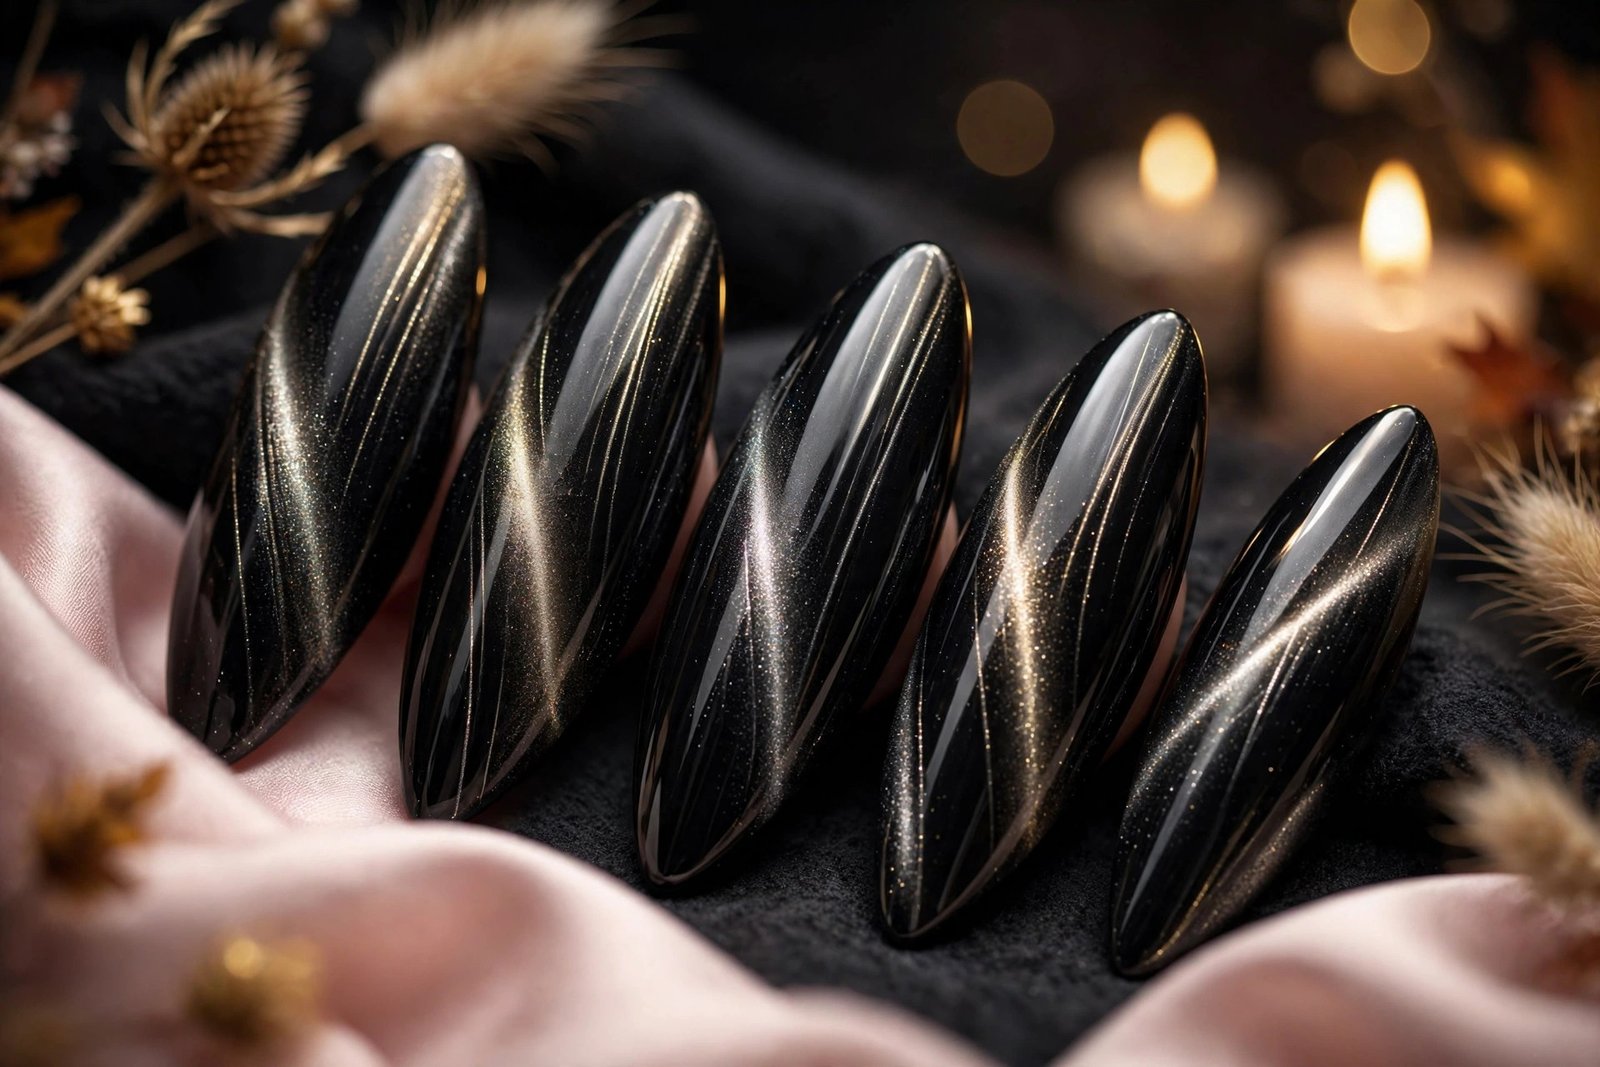
Cat-eye polish is a nail polish infused with tiny metallic magnetic particles. When you hold a small magnet near the wet polish, those particles pull toward the magnet and align into a light-reflecting pattern — usually a glowing stripe or “cat’s eye” line that shifts as your nail moves. The effect looks like a gemstone’s chatoyancy, which is where the name comes from.
The effect is created entirely by physics, not painting skill. That’s why the results look so professional even on a first attempt: the magnet organizes the particles into a pattern no brush could replicate by hand.
What You’ll Need
- Magnetic cat-eye gel polish or regular cat-eye polish in your chosen color (gel gives a stronger, longer-lasting effect)
- A magnet wand (usually included with the polish; if not, a strong small magnet works)
- Base coat (and for gel: a UV/LED lamp and gel base/top coat)
- Black gel or regular polish (optional, for the goth method below)
- Top coat — glossy
- Nail file, buffer, and cuticle pusher
- Rubbing alcohol or nail cleanser and lint-free wipes (for gel)
If you’re new to gel, doing gel nails at home covers the full at-home gel setup before you start.
Prep: The Foundation of a Good Cat-Eye
Magnetic polish shows every imperfection in your nail surface, so prep matters more here than with regular polish.
- Shape nails with a file and gently push back cuticles.
- Lightly buff the nail surface to remove shine and oils.
- Wipe each nail with rubbing alcohol or nail cleanser on a lint-free wipe.
- Apply base coat (cure it if using gel).
Smooth, oil-free nails give the magnetic particles a clean canvas to align on — skipping prep is the most common reason the effect looks weak.
The Technique, Step by Step
Work one nail at a time. Cat-eye polish must be wet when the magnet is applied, so there’s no painting all ten nails first.
Step 1: Apply the Color Coat
Apply one coat of cat-eye polish to a single nail. Use a medium-thick coat — too thin and there aren’t enough particles to form a strong effect; too thick and the polish floods the cuticles. If you’re using gel, do not cure yet.
Pro tip: Many nail artists apply a black base layer first (cured), then the cat-eye color over it. Black underneath makes the magnetic effect dramatically deeper and more visible, especially for goth and dark-red designs. This is optional but highly recommended for fall shades.
Step 2: Activate the Magnet
Hold the magnet wand about 2–3 millimeters above the wet polish — close, but not touching — for 10 to 15 seconds. You’ll see the stripe form in real time as the particles align. Hold the magnet steady; wobbling creates a blurry pattern.
To create different patterns, change the magnet’s angle:
– Classic cat-eye stripe: Hold the magnet flat and centered over the nail for a straight diagonal or vertical line.
– Velvet effect: Hold the magnet at the side of the nail to push particles into a soft, diffused glow instead of a sharp line.
– Halo/round effect: Hold a round magnet directly above the center of the nail for a glowing circle.
– Double line: Hold the magnet at an angle across the nail, then quickly shift it slightly to create two parallel lines.
Step 3: Lock It In
Once you’re happy with the pattern, cure the gel nail immediately (or let regular polish dry completely) before moving to the next nail. If using gel, the pattern freezes the moment it cures — which is why you shape it first and cure second.
Step 4: Top Coat
Apply a glossy top coat over all nails and cure (or dry). The glossy top coat is essential: it magnifies the light reflection that makes the cat-eye effect look three-dimensional. A matte top coat will mute the effect significantly.
For maximum wear, make your nail polish last longer has tips on capping the free edge and maintenance.
Goth Cat-Eye Designs for Fall
Goth cat-eye nails lean on deep, near-black bases where the magnetic stripe glows like moonlight. Pinterest’s 911% surge in goth cat-eye searches confirms this is the season’s dark horse.
- Black cat-eye: Black magnetic polish over a black base. The stripe appears as a silver or gunmetal flash — subtle in dim light, striking when it catches. The ultimate minimalist goth nail.
- Purple galaxy: Deep purple cat-eye polish, magnet held at an angle for a diagonal stripe. The purple particles read almost black until light hits them, then bloom into violet. Stunning on almond or stiletto shapes.
- Charcoal velvet: Gray-black polish with the magnet held at the side for the diffused velvet effect instead of a sharp line. Moody and soft rather than harsh — pairs well with silver rings.
- Midnight French: Apply black cat-eye polish, but hold the magnet only near the tip of the nail so the stripe concentrates at the free edge — a magnetic take on the French tip.
Dark-Red Cat-Eye Designs for Fall
Dark reds are fall’s signature nail color, and the magnetic effect gives them a molten, candlelit quality that flat burgundy polish can’t match.
- Burgundy cat-eye: Wine-colored magnetic polish over black. The stripe glows copper-red against the dark base — rich, expensive-looking, and perfect for October through December.
- Cherry black: Near-black cherry polish (often sold as “black cherry”) with a centered stripe. Reads black in shadow, flashes deep red in light. A favorite for Halloween week that still works at the office.
- Oxblood velvet: Oxblood polish with the side-held magnet for the velvet effect. The whole nail glows with a soft red shimmer rather than a defined line — elegant and very wearable.
- Accent-nail combo: Paint most nails in a flat dark red and do the cat-eye effect on just the ring fingers. This is a great entry point if you’re nervous about the technique — less pressure, still the full effect.
Troubleshooting
The Magnetic Effect Looks Weak
This is the number-one beginner complaint, and it almost always comes down to one of four things:
- The coat was too thin. Magnetic polish needs enough particles to form a visible pattern. Apply a slightly thicker coat next time.
- The magnet was too far away. It needs to be 2–3 mm above the surface. If your wand has a weak magnet, try holding it even closer (without touching).
- You skipped the black base. A black layer underneath amplifies the contrast enormously, especially with dark colors.
- The polish dried before magnetizing. With regular (non-gel) cat-eye polish, you have a short window. Work one nail at a time and magnetize immediately.
Streaks or Patchiness
Streaks usually mean the polish was disturbed after the magnet did its work — a wobbling hand, touching the nail, or curing too slowly. Hold the magnet steady, move straight to curing, and avoid brushing the top coat on too aggressively. If you’re getting why nail polish bubbles, the coat may be too thick — find the middle ground between “enough particles” and “so thick it bubbles.”
The Pattern Disappeared Under Top Coat
This happens when the top coat brush drags the uncured pattern. With gel, make sure the color coat is fully cured before top coat goes on. With regular polish, wait until the color is completely dry to the touch.
Key Takeaways
- Cat-eye nails use magnetic particles in the polish — the magnet creates the pattern, so no nail art skill is required.
- Work one nail at a time: apply polish, hold the magnet 2–3 mm above the wet surface for 10–15 seconds, then cure or dry immediately.
- A black base layer underneath makes the magnetic effect dramatically stronger, especially for goth and dark-red shades.
- Change the magnet’s angle and position to create different effects: classic stripe, velvet glow, halo, or double line.
- Weak magnetic effect is usually caused by too-thin coats, a magnet held too far away, or skipping the black base.
Frequently Asked Questions
Do I need a UV lamp for cat-eye nails?
Only if you’re using gel cat-eye polish. Regular (non-gel) magnetic polishes exist and work with the same magnet technique — they just have a shorter wear time and a slightly less intense effect. Gel gives the strongest, longest-lasting result, which is why most tutorials use it.
Can I use any magnet, or do I need the special wand?
The wand magnets sold with cat-eye polish are shaped and sized for nails, which makes the technique much easier. A strong small household magnet can work in a pinch, but weak refrigerator magnets won’t produce a visible effect. If your polish didn’t include one, wands are inexpensive and widely available.
How long do cat-eye nails last?
With gel polish and proper prep, two to three weeks — the same as any gel manicure. With regular magnetic polish, expect around a week with a good top coat. Capping the free edge with each layer extends wear for both types.
Why does my cat-eye polish look different in the bottle than on the nail?
The magnetic particles settle in the bottle, so the color looks flat until magnetized. Always roll the bottle gently between your palms before use (never shake — shaking creates bubbles) to redistribute the particles evenly.
Can I do cat-eye over an existing manicure?
Yes, as long as the existing color is fully dry (or cured, for gel). Apply the cat-eye polish as a top layer and magnetize as usual. Darker underlying colors produce a stronger effect, so this is a great way to refresh a plain black or burgundy manicure.
Love this? Pin it for later!