Diffusing vs Air Drying Curly Hair: Which Is Better?
Drying is the step where a wash day either comes together or falls apart. If you’ve been following a curly hair routine for beginners and your curls still look unpredictable, the drying method — not your products — is often the missing variable. Two options dominate the curly hair world: diffusing with a blow dryer attachment, or letting curls air dry naturally. Each one changes how curls look, feel, and hold up over the next few days.
So which is better? The honest answer is that neither wins outright. Diffusing gives you faster drying, more volume, and stronger definition — at the cost of some heat exposure. Air drying is gentler and simpler but slower, flatter, and more frizz-prone if your technique is off. This guide compares them side by side, walks you through both methods step by step, and helps you pick the right one for your curl type and schedule.
What Is Diffusing? (And How Does It Differ From Blow Drying?)
A diffuser is the wide, bowl- or prong-shaped attachment that comes with most hair dryers. It spreads airflow over a larger area so air moves slower and gentler than a bare dryer nozzle. When you place curls into the diffuser cup, the prongs lift them at the root while warm air circulates around them, setting the curl pattern as it dries.
The key difference from regular blow drying is control. A bare nozzle blasts concentrated hot air that disrupts the curl clumps formed with styling products, which is why blow-dried curly hair often turns frizzy. A diffuser’s dispersed airflow dries curls mostly undisturbed, preserving the clump structure. Most curl experts recommend using it on low or medium heat and low airflow — the goal is gentle drying, not a power blast.
What Is Air Drying?
Air drying is one of the gentlest ways to dry curls: after applying styling products, you let hair dry on its own with zero heat. Depending on thickness, density, and porosity, full drying takes anywhere from two to six hours — many curlies air dry partially, then diffuse the rest.
Diffusing vs Air Drying: Side-by-Side Comparison
| Factor | Diffusing | Air Drying |
|---|---|---|
| Drying time | 15–30 minutes | 2–6 hours |
| Volume | More lift at the roots; prongs lift hair as it dries | Flatter roots; hair sits closer to the scalp |
| Curl definition | Stronger, more structured clumps; pattern sets firmly | Softer, more natural look; clumps can loosen |
| Frizz | Low if technique is right; high if airflow is too strong or you touch curls too much | Moderate to high; long drying time leaves curls vulnerable to humidity and touching |
| Damage risk | Some heat exposure — minimized with low heat, heat protectant, and keeping the dryer moving | None from heat, but prolonged wetness can weaken hair and long drying invites touching |
| Convenience | Fast; great for busy mornings and cold weather | Hands-off but very slow; wet hair for hours |
| Shrinkage | Moderate; stretching techniques (like hover diffusing) can elongate curls | Higher; gravity pulls wet curls down, then they spring up as they dry |
Drying Time
This is the biggest practical difference. Diffusing takes roughly 15 to 30 minutes — most curlies diffuse until hair is 80–90% dry and let the rest air dry to save time and heat exposure. Air drying takes two to six hours depending on how much hair you have and its porosity. High-porosity hair soaks up water and takes longest; fine, low-density hair can dry in under two hours. If you wash your hair before work or on a cold evening, drying time alone often decides the method.
Volume
Diffusing wins clearly here. The diffuser’s prongs physically lift hair at the root while warm air sets that lift in place. Air-dried curls sit flat while they dry because wet hair is heavy — especially during the first hour. Root clipping can help, but it rarely matches the lift of diffusing.
Definition
Diffusing sets curl clumps quickly and firmly, which usually means more structured, defined curls. The heat locks in the pattern your styling products created. Air drying produces softer, more natural-looking curls, but the long drying window gives clumps more time to loosen, separate, or get disturbed — by touching, wind, or humidity. Air-dried results depend heavily on leaving your hair completely alone until it’s dry.
Frizz
This one is a toss-up and depends almost entirely on technique. Diffusing with low heat and low airflow, without moving the dryer around too much, produces smooth, frizz-controlled results. Diffusing wrong — high heat, high airflow, constantly moving hair around — creates more frizz than air drying ever would. Air drying has an inherent frizz disadvantage: hair stays damp and vulnerable for hours, absorbing humidity and frizzing when touched. In dry indoor air, air drying can produce great low-frizz results; in humid weather, diffusing is usually the safer bet.
Damage Risk
Air drying involves zero heat, so it carries no thermal damage risk. But “no heat” isn’t the same as “no risk”: hair is most fragile when wet, and staying damp for hours every wash day can weaken it through repeated swelling and drying (sometimes called hygral fatigue). Diffusing on low heat is far gentler than flat irons or high-heat blowouts, and keeping the dryer moving, using a heat protectant, and stopping at 80–90% dry keeps damage risk very low.
How to Diffuse Curly Hair Correctly (Step by Step)
Good diffusing is a technique, not a race. Follow these steps for defined, frizz-controlled curls:
1. Start with soaking-wet, styled hair
Apply your leave-in conditioner, curl cream, and gel (or your usual styling lineup) to soaking-wet hair first, exactly as you would in your curly hair routine. Diffusing works best on hair that’s already formed into clumps.
2. Remove excess water with a microfiber towel or T-shirt
Gently scrunch — don’t rub — with a microfiber towel or an old cotton T-shirt to remove dripping water. Rubbing with a terry-cloth towel roughs up the cuticle and creates frizz before you even start.
3. Apply heat protectant
Because diffusing involves heat, a heat protectant is worth using — especially if you diffuse regularly or on anything above the lowest heat setting. (More on this below.)
4. Set the dryer to low or medium heat, low airflow
Low heat and low airflow is the standard recommendation. High settings dry faster but blow curls apart and cause frizz. Medium heat is fine for most hair types once you’re comfortable with the technique.
5. Pixie diffuse: cup sections into the bowl
Tilt your head to one side, place a section of curls into the diffuser bowl, and bring the diffuser up toward your scalp. Hold for 20–30 seconds per section, then move to the next. “Pixie diffusing” (turning the dryer off between sections so airflow never hits unsecured hair) gives the smoothest results because curls are only exposed to air while cupped.
6. Hover diffuse the roots if you want extra volume
For lift, hold the diffuser a few inches from your roots without touching the hair — the “hover” method. This sets root volume without disturbing the pattern lower down.
7. Stop at 80–90% dry
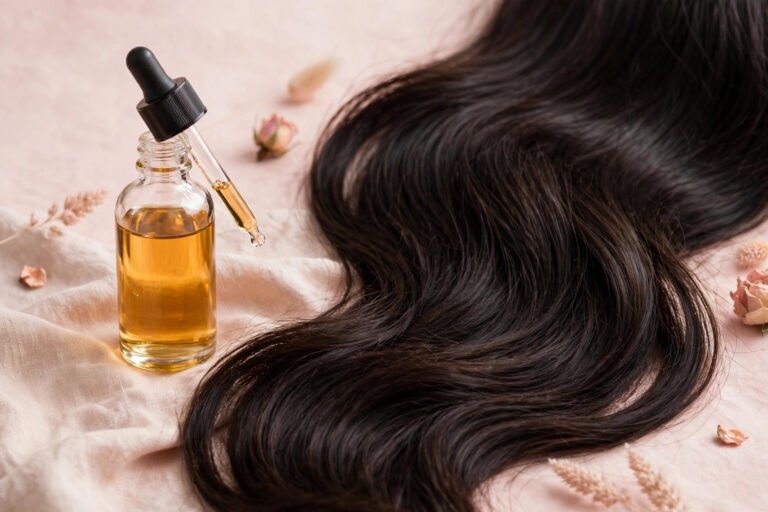
Hair should feel dry but not hot or crispy. Letting the last bit air dry minimizes heat exposure. Once fully dry, scrunch out any gel cast with a tiny bit of hair oil for soft, defined curls.
Common Diffusing Mistakes
- High heat and high airflow. The number-one cause of diffused frizz.
- Touching curls constantly. Every time you reposition or separate curls mid-dry, you break clumps.
- Moving the dryer in circles. Keep it still while cupping each section.
- Diffusing soaking-wet hair on high heat. Remove dripping water first, or you’ll just be blasting steam.
- Diffusing to 100% bone-dry on hot settings. The last 10% of drying causes the most heat exposure relative to benefit — stop early.
How to Air Dry Curly Hair for the Best Results
Air drying is simple but not effortless — good results depend on setup, not luck:
1. Style on soaking-wet hair
Same rule as diffusing: apply styling products to soaking-wet hair so every curl gets evenly coated.
2. Scrunch out excess water with a microfiber towel or T-shirt
Removing dripping water cuts drying time significantly. Scrunch gently upward — this also encourages clump formation.
3. Consider plopping for 15–20 minutes
Plopping (wrapping hair in a T-shirt or microfiber towel turban) absorbs excess water and helps clumps form without gravity pulling them down. Don’t leave it on for hours — damp, enclosed hair flattens curls.
4. Clip the roots for volume
Since air drying flattens roots, use root clips or claw clips at the crown to hold hair up while it dries. This is the single biggest upgrade most air-dryers can make.
5. Don’t touch your hair until it’s fully dry
This is the hard rule. Touching, scrunching, or flipping partially-dry curls breaks the cast your gel formed and causes frizz that can’t be fixed until the next wash day.
6. Once dry, scrunch out the cast
When hair is 100% dry (squeeze a curl — it should feel dry all the way through, not cool or damp), scrunch out the gel cast with dry hands or a drop of hair oil. Fluff the roots gently for volume.
Which Method Suits Your Curl Type?
Wavy hair (Type 2)
Diffusing usually wins. Waves lose their pattern easily, and air drying’s long wet window lets waves fall flat or go straight. Diffusing sets the wave pattern quickly, adds root volume (the biggest struggle for wavies), and scrunching into the diffuser cup encourages wave formation. Use the lowest heat and stop early.
Curly hair (Type 3)
Both work well — pick based on your priorities. Type 3 curls hold their pattern during long air dries and often look beautifully defined with zero heat. Choose diffusing when you want more volume and a faster routine, or air drying when you want a softer look and have time. Many Type 3 curlies use a hybrid: air dry most of the way, then diffuse for 5–10 minutes for root lift.
Coily hair (Type 4)
Diffusing is usually more practical. Coily hair is dense, holds a lot of water, and can take six or more hours to air dry — during which it’s heavy, stretched, and vulnerable. Diffusing on low heat dramatically shortens that window and adds volume at the roots. Stretching methods like banding before diffusing can also reduce shrinkage. If you prefer air drying, plopping and keeping hair stretched while it dries helps.
Fine or low-density hair
Diffusing. Fine hair air-dries fast anyway, but it also goes flat fast — diffusing adds the volume fine hair desperately needs and sets curls before they can fall.
Thick or high-density hair
Diffusing (or a hybrid). Full air drying can take all day on thick hair, and the weight of all that water pulls curls down. Diffusing until 80% dry, then air drying the rest, is the most efficient approach.
Damaged or heat-sensitive hair
Air drying, or diffusing on the lowest heat with protectant. If your hair is recovering from damage, minimize heat — but don’t let it stay wet for six hours either. A short, gentle diffuse session is often healthier than an all-day air dry.
Heat Protection for Diffusing
Any time heat touches your hair, a heat protectant is good insurance — and yes, that includes the relatively gentle heat of a diffuser. Heat protectants form a film around the hair shaft that slows moisture loss and reduces cuticle damage from warm air. The basics:
- Apply to damp hair before diffusing, after your styling products. A spray or light cream formula works best — heavy protectants can weigh curls down.
- Skip it only if you truly air dry with zero heat — but keep a protectant on hand for the days you do diffuse.
For a deeper breakdown of when heat protectant is and isn’t necessary, read do you need heat protectant.
Frequently Asked Questions
Is diffusing bad for curly hair?
Not when done correctly. Diffusing on low or medium heat with low airflow is one of the gentlest forms of heat styling. Damage risk rises with high heat, long sessions on soaking-wet hair, or skipped heat protectant — used sensibly, it’s safe for regular wash days.
Does air drying cause more frizz than diffusing?
Often, yes — but it depends on conditions. Air drying leaves hair damp and vulnerable for hours, during which humidity, touching, and movement all create frizz. In humid weather, diffusing usually wins because curls are set quickly. In dry indoor air with a strict hands-off rule, air drying can produce beautifully smooth results.
Can you diffuse every wash day?
Yes, most curlies who diffuse do it every wash day without issues, provided they use low-to-medium heat and heat protectant. The cumulative heat exposure from gentle diffusing is minimal compared to other heat styling. If your hair is damaged or very fine, consider diffusing to 80% dry and air drying the rest.
Should you diffuse with hot or cold air?
Warm (low to medium heat) is the standard recommendation — it dries efficiently while setting the curl pattern. Cool air works too and carries zero heat risk, but it takes noticeably longer, which partly defeats the purpose of diffusing. Avoid the hottest setting entirely; it causes frizz and unnecessary damage.
Why does my hair look frizzier when I diffuse than when I air dry?
The usual culprits are high heat, high airflow, touching curls while they’re drying, or moving the dryer around instead of holding it still on each section. Try pixie diffusing (turning the dryer off between sections), dropping to the lowest heat and airflow, and not touching your hair until it’s done — most diffusing frizz is a technique problem, not a method problem.
Key Takeaways
- Diffusing dries curls in 15–30 minutes with more volume and firmer definition; air drying takes 2–6 hours with zero heat but flatter roots and more frizz risk.
- Neither method is universally better — diffusing suits busy schedules, humid weather, and volume seekers; air drying suits heat-sensitive hair and relaxed wash days.
- Diffusing technique matters more than the tool: low heat, low airflow, still positioning, and no touching until dry.
- Air drying works best with a strong setup — style on soaking-wet hair, plop briefly, clip the roots, and don’t touch until 100% dry.
- Wavy and coily hair usually benefit most from diffusing; classic curly hair does well with either.
- A hybrid approach (diffuse to 80–90%, air dry the rest) gives you the best of both: speed and volume with minimal heat.
- Always use heat protectant when diffusing, even on low heat — it’s cheap insurance for your curls.
Love this? Pin it for later!