Best Eyebrow Pencil for Beginners: How to Choose the Right One
Walk into any beauty aisle and you’ll face a wall of brow pencils — retractable, wooden, micro-tip, chubby, waxy, powdery, with spoolies, without spoolies, in twelve shades of brown. For a beginner, it’s paralyzing. Pick the wrong type and you’ll fight your tools every morning; pick the right one and filling your brows becomes a two-minute step you actually enjoy.
This guide doesn’t rank specific brands from personal testing — instead, it teaches you how brow pencils actually differ, which types suit beginners best, what features are worth paying for, and how to pick your shade. Once you understand the categories, you can walk into any store (or browse any site) and choose confidently.
For the technique itself once you’ve bought your pencil, see our guide on how to fill in eyebrows naturally. And if you haven’t tidied your shape yet, start with our eyebrow shaping guide for beginners.
The Main Types of Brow Pencils (and Who Each Suits)
Brow pencils fall into a few distinct categories. Understanding them is more useful than any brand ranking, because the type determines how the pencil behaves on your skin.
Retractable Micro-Tip Pencils
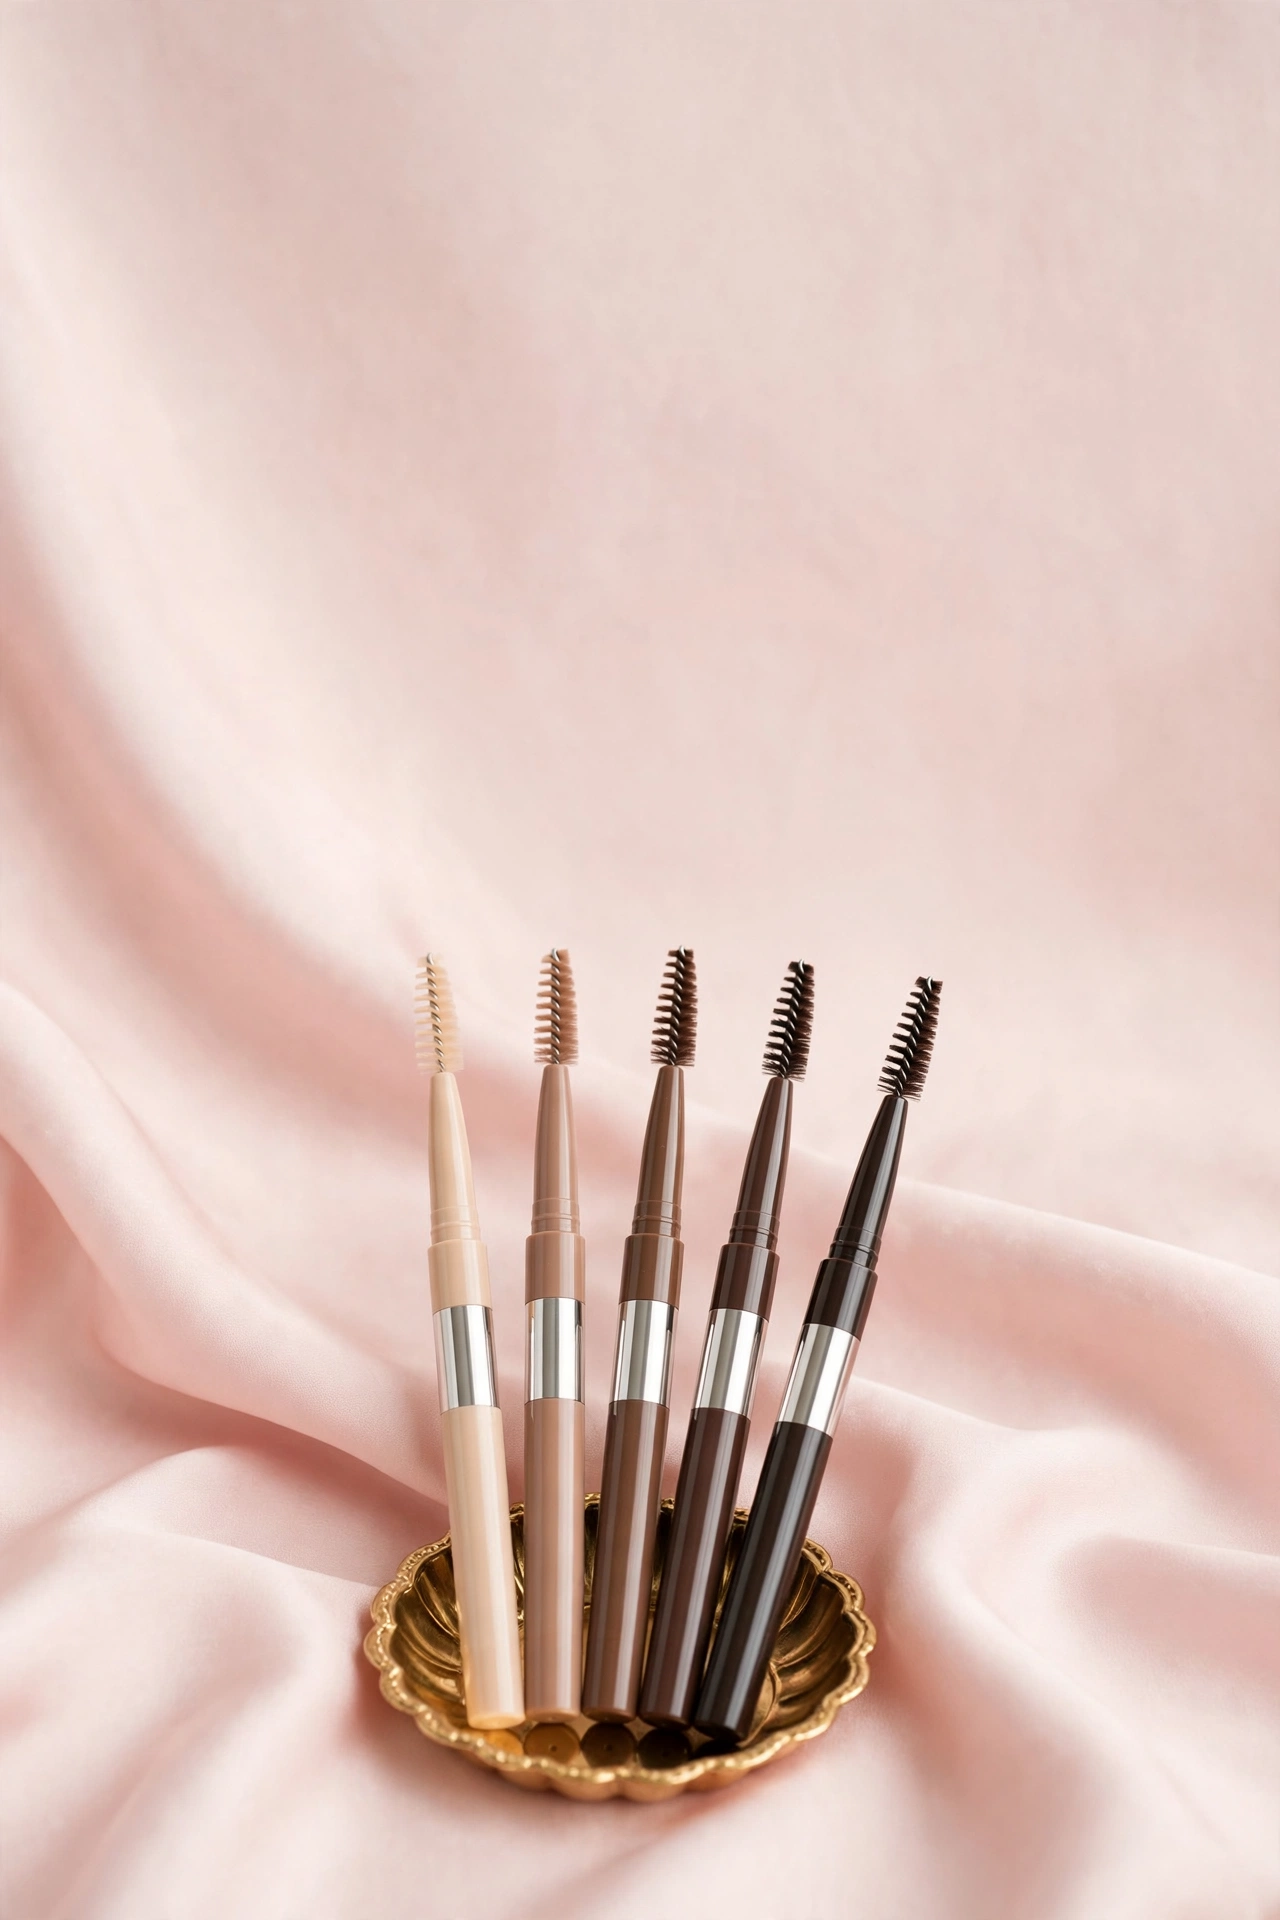
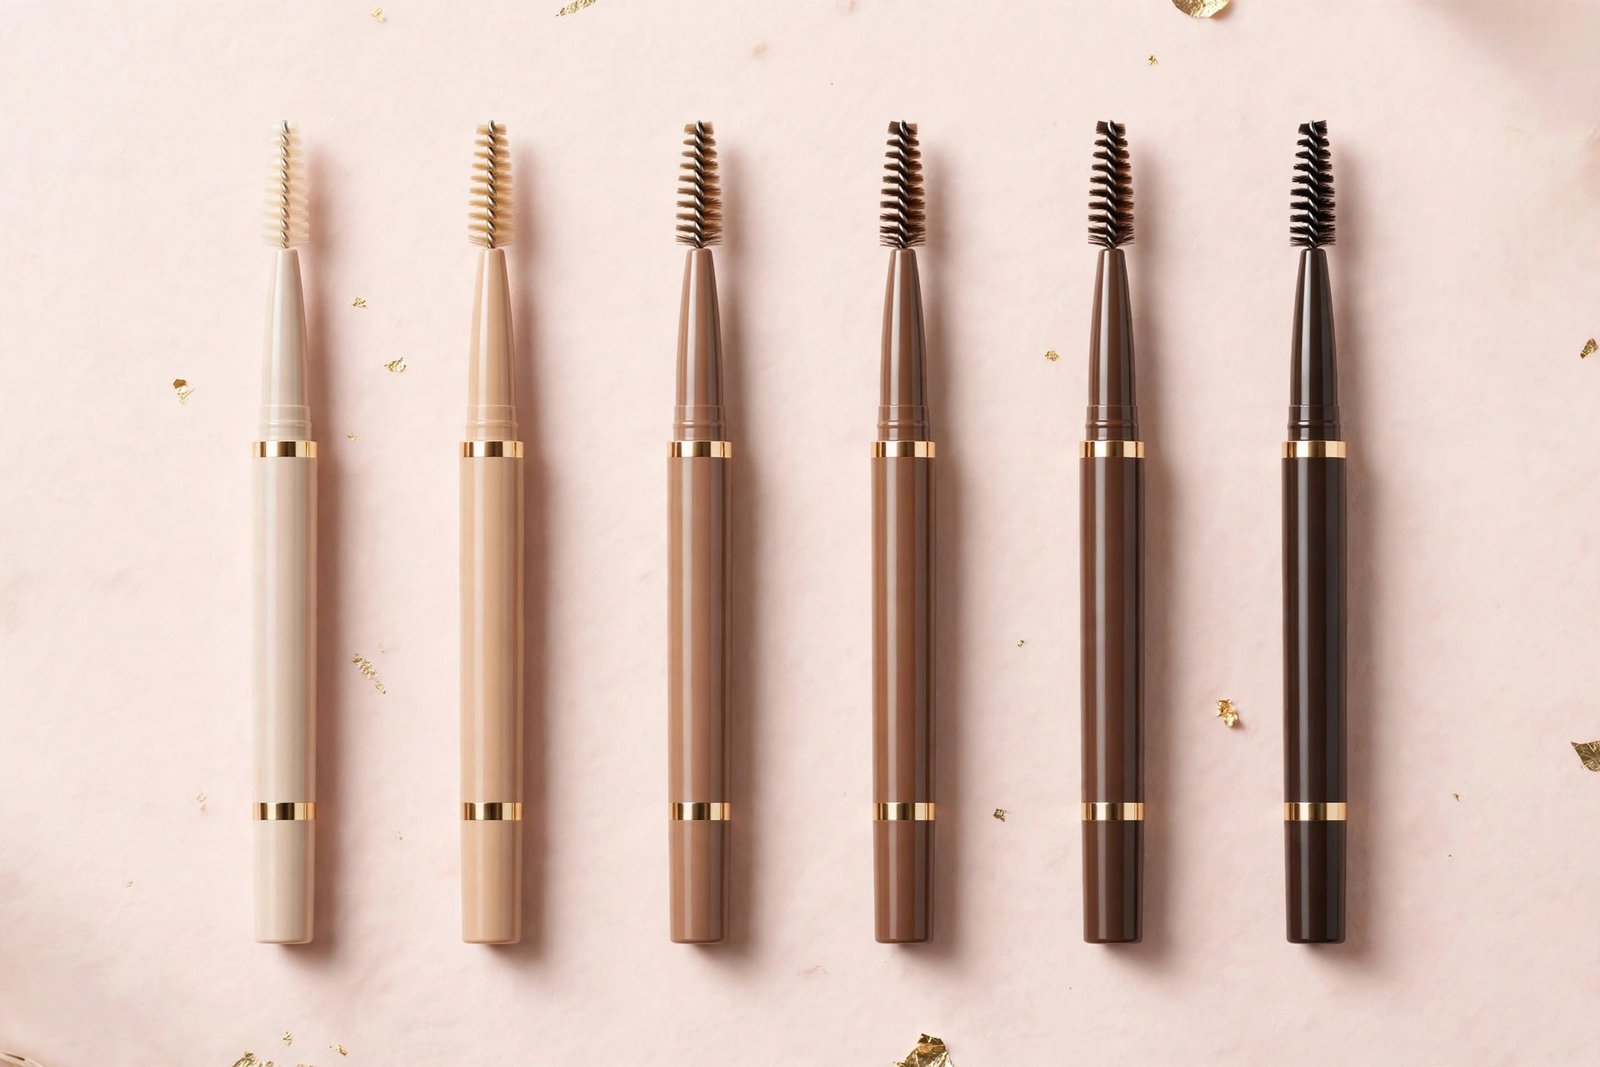
The thin, twist-up pencil with a fine point — the most popular brow product format today. The ultra-fine tip lets you draw precise, hair-like strokes, making it the best choice for defining tails, filling small gaps, and creating a natural look on sparse brows.
Best for: beginners who want precision, sparse brows, detailed work. This is the type most makeup artists recommend as a first brow pencil.
Watch out for: tips that are too fine can snap if you press hard (use a light hand anyway), and very waxy formulas can look shiny or skip on oily skin. Twist up only a millimeter or two at a time — the thin lead breaks easily if overextended.
Retractable Chubby / Slanted Pencils
A thicker twist-up pencil, often with a slanted or teardrop-shaped tip. The wider tip covers more area faster, and the angled edge can draw both fine lines (using the point) and broader strokes (using the flat side).
Best for: beginners with medium-to-full brows who mainly need to add fullness rather than draw individual hairs. Faster to use than a micro-tip for a daily routine.
Watch out for: less precision for fine detail like tail definition. If your brows are sparse, a chubby tip can look heavy-handed.
Traditional Wooden Pencils (Sharpenable)
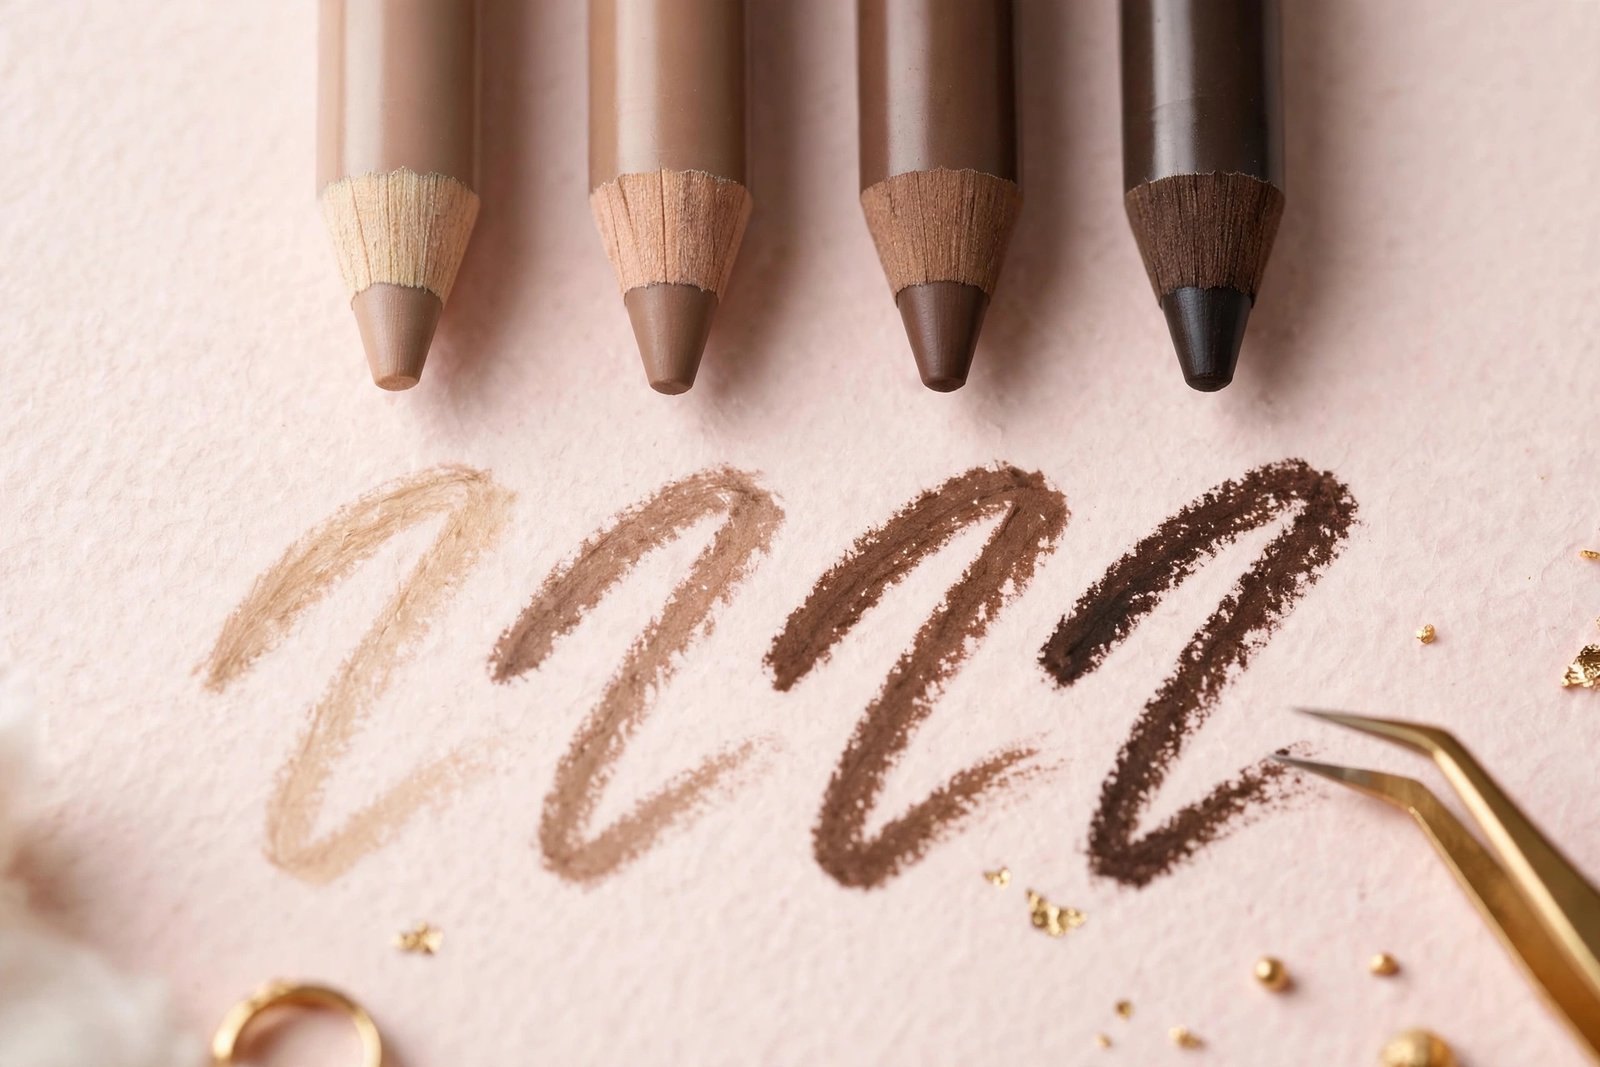
The classic cosmetic pencil you sharpen yourself. These tend to have a softer, more pigmented core than retractable formulas, giving a slightly bolder, more made-up look.
Best for: anyone who likes a defined, polished brow, or who finds retractable tips too fiddly. Also usually the most affordable option.
Watch out for: they require a sharpener (a dull wooden pencil is useless for brows), the soft core can go on too heavy for beginners, and they need more blending to look natural. Keep the point slightly rounded rather than needle-sharp for the most natural result.
Brow Pens / Felt-Tip Markers
Liquid or gel formula in a pen with a fine felt tip or a multi-prong “microblade” tip that stamps several hair-like lines at once. These create very defined, long-wearing strokes.
Best for: oily skin (liquid formulas tend to last longer than wax pencils on oil), and anyone wanting extra-long wear.
Watch out for: the least forgiving format for beginners — liquid goes on dark immediately and is hard to blend or correct. The multi-prong tips can also look stamped and artificial if overused. Generally better as a second brow product once you’re comfortable with a pencil.
Mechanical / Twist Pencils (Standard Tip)
The middle ground: a twist-up pencil with a standard (not micro) tip. Easier to control than a wooden pencil, more forgiving than a micro-tip, no sharpener needed.
Best for: true beginners who want the simplest possible experience. If decision paralysis is the problem, this format is the safe default.
Features Worth Looking For
Beyond the type, a few features separate beginner-friendly pencils from frustrating ones:
A spoolie on the opposite end. This is the single most useful feature. The spoolie blends your strokes into your real hairs, softens harsh lines, and distributes product evenly. A pencil with a built-in spoolie means one less tool to buy and keep track of. Prioritize this.
Retractable over sharpenable (for beginners). No sharpener to carry, no wasted product from sharpening, and the tip stays a consistent shape. Wooden pencils are fine, but retractable removes a variable.
A smooth, medium-firm formula. The ideal beginner formula glides without dragging but isn’t so soft that it deposits heavy color with one touch. In the store, testers should draw a line that’s visible but not intensely dark with light pressure. Formulas described as “waxy” tend to be firmer and more natural-looking; “creamy” formulas go on bolder.
Smudge-resistance. Brow pencils encounter oil, sweat, and touching throughout the day. Look for packaging that mentions long-wear, waterproof, or smudge-proof. You don’t need full waterproofing for daily life, but basic smudge resistance prevents the dreaded midday brow migration.
Shade range with neutral options. A brand that offers ashy, neutral taupe shades (not just warm browns) gives you a better chance of matching your undertones. Shade matching matters more than brand prestige.
How to Choose Your Shade
This deserves its own section because wrong shade choice ruins even perfect technique:
-
Start with your brow hair, not your head hair. Match to the hair actually growing in your brows, which is often slightly darker or ashier than scalp hair (especially for blondes and redheads).
-
Dark brows (dark brown/black hair): go one shade lighter than your brow hair. A too-dark pencil is the fastest way to harsh, drawn-on brows.
-
Medium brown hair: match your brow hair or go very slightly lighter.
-
Blonde hair: go one to two shades darker than your brow hair, in an ashy taupe. Resist anything warm or golden — it reads orange on the skin.
-
Red/auburn hair: choose a warm medium brown or auburn-toned pencil. Cool ash shades will look gray and disconnected.
-
Gray/silver hair: soft taupe or light ash brown usually looks most natural and keeps brows defined without harshness.
-
Check the undertone in natural light. Warm pencil + cool hair (or vice versa) looks wrong even when the depth is right. When uncertain, neutral-to-ashy is the safest undertone family for most people.
The in-store test: draw a short stroke on the back of your hand, then hold it next to your brow in the store’s natural-light area (near windows or doors). Better yet, test at the tail of your actual brow — the least visible spot — before committing.
What Beginners Should Avoid
Ultra-dark “universal” shades. There’s no truly universal brow shade. A single dark brown pencil marketed as “suits everyone” will be too dark for most people and too warm for many.
Glittery or shimmery formulas. Brow products should always be matte. Shimmer in a brow pencil catches light unnaturally and draws attention to the makeup rather than the brow.
Pencils without a spoolie (as your only product). You can buy a standalone spoolie, but as a beginner, having it attached to the pencil means you’ll actually use it — and blending is what makes brows look natural.
The cheapest no-name pencils with no shade information. Extremely cheap pencils often have inconsistent formulas (too hard, too waxy, or crumbly) and vague shade naming that makes matching a gamble. You don’t need luxury pricing — the drugstore middle range is the sweet spot — but avoid the bottom-tier mystery pencils.
Buying three shades “to be safe.” Start with one well-chosen shade. You can adjust depth with pressure (lighter hand = lighter result), so a single correct-undertone pencil covers a range of intensities.
Price: What Should You Expect to Pay?
Brow pencils span from a few dollars to over $25, but price correlates weakly with beginner-friendliness. The practical tiers:
- Budget ($3–$8): perfectly serviceable. Many perform as well as pricier options for basic filling. Shade ranges may be narrower, so matching takes more care.
- Mid-range ($9–$16): the sweet spot for beginners. Better shade ranges, more reliable formulas, and spoolies included as standard. Most beginners should shop here.
- Premium ($17+): nicer packaging and sometimes finer tips, but no beginner needs this tier. Upgrade later if you become a brow enthusiast, not at the start.
A brow pencil used daily typically lasts 2–4 months. At mid-range prices, that’s a very affordable routine.
Getting the Most From Your First Pencil
A few habits that make any pencil perform better:
- Store tip-down (for retractable) so product stays at the tip.
- Twist up minimally — 1–2mm of a micro-tip is plenty and prevents snapping.
- Warm the tip on the back of your hand with a stroke or two before touching your brow; this softens the formula for smoother application.
- Clean the spoolie occasionally with a tissue to prevent product buildup that makes blending streaky.
- Cap it after use. Brow pencil formulas dry out and harden when left uncapped, making them drag on the skin.
Pair your new pencil with the stroke technique in our natural fill-in guide — the right tool plus the right technique is what produces believable brows.
Key Takeaways
- For most beginners, a retractable micro-tip or standard-tip pencil with a built-in spoolie is the best first purchase — precision plus blending in one tool.
- Match shade to your brow hair (not head hair), going one shade lighter for dark brows and slightly darker for very light brows, with attention to undertone.
- Prioritize features that help beginners: attached spoolie, retractable format, smooth medium-firm formula, and smudge resistance.
- Avoid liquid brow pens as a first product — they’re the least forgiving format.
- The drugstore-to-mid-range tier ($9–$16) is the sweet spot; price doesn’t determine beginner-friendliness.
- Technique matters as much as the tool — light pressure, hair-like strokes, and thorough spoolie blending make any decent pencil look natural.
Frequently Asked Questions
What is the easiest eyebrow pencil for a complete beginner?
A retractable pencil with a standard (not ultra-fine) tip and a spoolie on the other end. It’s the most forgiving combination: no sharpener needed, the tip is easy to control, and the attached spoolie means blending is always one flip away. Choose a shade matched to your brow hair’s undertone.
Should beginners use a brow pencil or brow powder?
Pencil first. Pencils give more control, mistakes are easier to fix (blend or wipe away), and the stroke technique is intuitive. Powder needs brush skills and a light touch to avoid looking muddy. Once you’re comfortable with a pencil, adding powder for soft fullness is a natural next step.
How do I stop my brow pencil from looking too dark?
Three fixes: use a lighter hand (barely let the pencil touch the skin), choose a shade one step lighter than you think you need, and always blend with the spoolie after every few strokes. Building color in two sheer layers looks natural; one heavy layer looks drawn on.
How long does an eyebrow pencil last?
With daily use, a standard retractable brow pencil lasts roughly 2–4 months. Micro-tip pencils tend to run out faster because the thin lead deposits less per stroke but gets used up quicker with daily detailing. You’ll notice the color getting fainter or the twist mechanism reaching its end.
Can I use an eyeliner pencil on my eyebrows?
Not ideally. Eyeliners are usually too creamy, too pigmented, or the wrong undertone for brows, and they tend to smudge or look harsh. In a genuine pinch, a matte brown eyeliner applied very lightly can work for one day — but a dedicated brow pencil is inexpensive and performs far better.
Conclusion
Choosing your first brow pencil doesn’t require brand expertise — it requires knowing the types, the features that help beginners, and how to match your shade. A retractable pencil with a spoolie, in the right undertone, from the mid-range shelf, will serve you well for months. Combine it with light, hair-like strokes and thorough blending, and you’ll have natural-looking brows from the very first week.
Don’t overthink the purchase. Get the pencil, learn the technique, and adjust as you go — brows are one of the most forgiving areas of makeup to practice on.
Love this? Pin it for later!